# Introduction to Docker – Part 3Learn how to write a Dockerfile, build a custom Docker image, and launch ready-to-use containers on Linux.

This tutorial series will show you how to use Docker on a Linux computer. This part is dedicated to creating a Dockerfile.
## The Dockerfile
In the [previous tutorial]({{< relref "tutorials/computer_science/introduction_to_docker_part2">}}) we noticed that every time a new container is created, any changes made in previous containers based on the same image are lost, because the base image itself never changes.
To make permanent changes, we create a custom image on top of the existing one. That is exactly what the Dockerfile is for.
A Dockerfile is a plain-text file that lists the instructions needed to build a new Docker image. Any container launched from that custom image will already include everything you specify in the Dockerfile. Let’s see how to write one in detail.
## Preparing the files
The following example shows how to create a Dockerfile for an older Ubuntu version—Ubuntu 20.04.
You can check your current host version with `cat /etc/os-release`:
Example:
```bash {title="Terminal"}
mowibox@chroma:~$ cat /etc/os-release
PRETTY_NAME="Ubuntu 24.04.2 LTS"
NAME="Ubuntu"
VERSION_ID="24.04"
VERSION="24.04.2 LTS (Noble Numbat)"
VERSION_CODENAME=noble
ID=ubuntu
```
Here, the host is running Ubuntu 24.04. We will now create an image based on Ubuntu 20.04.
Choose a location and create a folder (manually or with `mkdir `).
In this example, we’ll call it "docker_folder/".
Inside that folder:
* Create a Dockerfile at the root.
* Create another folder and place any file you like inside.
In this example we’ll create "my_folder/" and add a Python file `my_python_file.py`:
``` py {title="my_python_file.py", lineNos=true}
# A simple display
print("Hello, World!")
# An addition just as simple (I hope)
a = 1
b = 2
c = a + b
print(f"{a} + {b} = {c}")
```
Your tree should look like this:
```plaintext
docker_folder/
├── Dockerfile
└── my_folder/
└── my_python_file.py
```
## Dockerfile contents
Open `Dockerfile` in your favorite editor (e.g.,[Visual Studio Code](https://code.visualstudio.com/download)) and add:
```Dockerfile {title="Dockerfile", lineNos=true}
FROM ubuntu:20.04
# Update Ubuntu and install dev tools
RUN apt-get update && apt-get upgrade -y
RUN apt-get install -y git python3-pip nano
# Clean up temporary APT files
RUN rm -rf /var/lib/apt/lists/*
# Copy the folder into the container
COPY my_folder/ my_image_folder
# Create a working directory
RUN mkdir -p /workspace
```
Here is the line-by-line explanation of what the `Dockerfile` does:
```Dockerfile {lineNos=true, lineNoStart=1}
FROM ubuntu:20.04
```
* `FROM` sets the base image: here Ubuntu 20.04.
```Dockerfile {lineNos=true, lineNoStart=4}
RUN apt-get update && apt-get upgrade -y
```
* `RUN` executes a given command. Here we update package lists and upgrade installed packages.
{{< callout context="note" title="Why the '-y' flag?" icon="outline/info-circle" >}}
The `-y` flag automatically answers “yes” to any prompts, making the process fully unattended.
{{< /callout >}}
```Dockerfile {lineNos=true, lineNoStart=5}
RUN apt-get install -y git python3-pip nano
```
* This line installs some dev tools:
* `git`: for GitHub/GitLab.
* `python3-pip`: for installing Python packages.
* `nano`: for in-terminal text-editing.
```Dockerfile {lineNos=true, lineNoStart=8}
RUN rm -rf /var/lib/apt/lists/*
```
* This line removes APT cache to keep the final image slim.
```Dockerfile {lineNos=true, lineNoStart=11}
COPY my_folder/ my_image_folder
```
* Copies "my_folder/" from the host into the container as "my_image_folder/".
{{< callout context="danger" title="Heads-up" icon="outline/alert-square-rounded" >}}
If your host folder is not named "my_folder/", adjust this line accordingly!
{{< /callout >}}
```Dockerfile {lineNos=true, lineNoStart=14}
RUN mkdir -p /workspace
```
* This line creates a "/workspace" directory at the container root.
### Building the image
With the `Dockerfile` ready, we can proceed with building the Docker image.
Open a terminal at the location of your `Dockerfile`, and run the command :
```bash {frame="none"}
docker build -t .
```
Replace `` with whatever name you like.
The dot `.` means “use the current directory as the build context.”
You’ll see each Dockerfile layer executing one after another:
```bash {title="Terminal"}
mowibox@chroma:~$ docker build -t my_custom_ubuntu .
[+] Building 8.1s (5/10)
=> [internal] load build definition from Dockerfile
=> transferring dockerfile: 355B
=> [internal] load metadata for docker.io/library/ubuntu:20.04
=> [internal] load .dockerignore
=> transferring context: 2B
=> [1/6] FROM docker.io/library/ubuntu:20.04@sha256:8feb4d8ca5354def3d8fce243717141ce31e2c428701f6682b
=> resolve docker.io/library/ubuntu:20.04
=> sha256:8feb4d8ca5354def3d8fce243717141ce31e2c428701f6682bd2bfae15388214 6.69kB / 6.69kB
=> sha256:c664f8f86ed5a386b0d9818f81714e21a8b9c73f568c4bea56aa179d54a 424B / 424B
=> sha256:b7ba04fd9aa0c77fc0cc7bf993fd6946545983d9096126e5a4f45d713 2.30kB / 2.30kB
=> sha256:13b7e930469f6d3575a320709035c6ac6fcf5485a76abcf03d1b92a64c09c2476 27.51MB / 27.51MB
=> extracting sha256:13b7e930469f6d3575a320709035c6ac6fcf5485a76abcf03d1b92a64c09c2476
=> [internal] load build context
=> transferring context: 77B
=> [2/6] RUN apt-get update && apt-get upgrade -y
=> # Fetched 35.7 MB in 2s (15.0 MB/s)
=> # Reading package lists...
=> # Building dependency tree...
```
It may take some time to build the image. Once finished, you'll be able to see your new image in the list of images with (`docker images`).
Example :
```bash {title="Terminal"}
mowibox@chroma:~$ docker images
REPOSITORY TAG IMAGE ID CREATED SIZE
my_custom_ubuntu latest a67e56745215 43 seconds ago 980MB
```
### Running the container
As in the previous tutorial, you can start a container of your custom image:
```bash {frame="none"}
docker run -it
```
Example :
```bash {title="root@3d18c90647a5:/"}
mowibox@chroma:~$ docker run -it my_custom_ubuntu
root@3d18c90647a5:/#
```
You can check that you are in a container based on Ubuntu 20.04 with the command used at the beginning of the tutorial:
Example:
```bash {title="root@3d18c90647a5:/"}
root@3d18c90647a5:/# cat /etc/os-release
NAME="Ubuntu"
VERSION="20.04.6 LTS (Focal Fossa)"
ID=ubuntu
ID_LIKE=debian
PRETTY_NAME="Ubuntu 20.04.6 LTS"
VERSION_ID="20.04"
```
Check your folders with the `ls` command:
```bash {title="root@3d18c90647a5:/"}
root@3d18c90647a5:/# ls
bin dev home lib32 libx32 media my_image_folder proc ros_entrypoint.sh sbin sys usr workspace
boot etc lib lib64 log mnt opt root run srv tmp var
```
If everything goes well, you should see "my_image_folder/" and "workspace/".
If you navigate to the “my_image_folder/”, you'll find the Python file that you can run:
```bash {title="root@3d18c90647a5:/"}
root@3d18c90647a5:/# cd my_image_folder/
root@3d18c90647a5:/my_image_folder# ls
my_python_file.py
root@3d18c90647a5:/my_image_folder# python3 my_python_file.py
Hello, World!
1 + 2 = 3
```
Since `nano` was previously installed on the image, you can also edit the file and see that it's identical to the one created on your machine:
```bash {frame="none"}
nano my_python_file.py
```
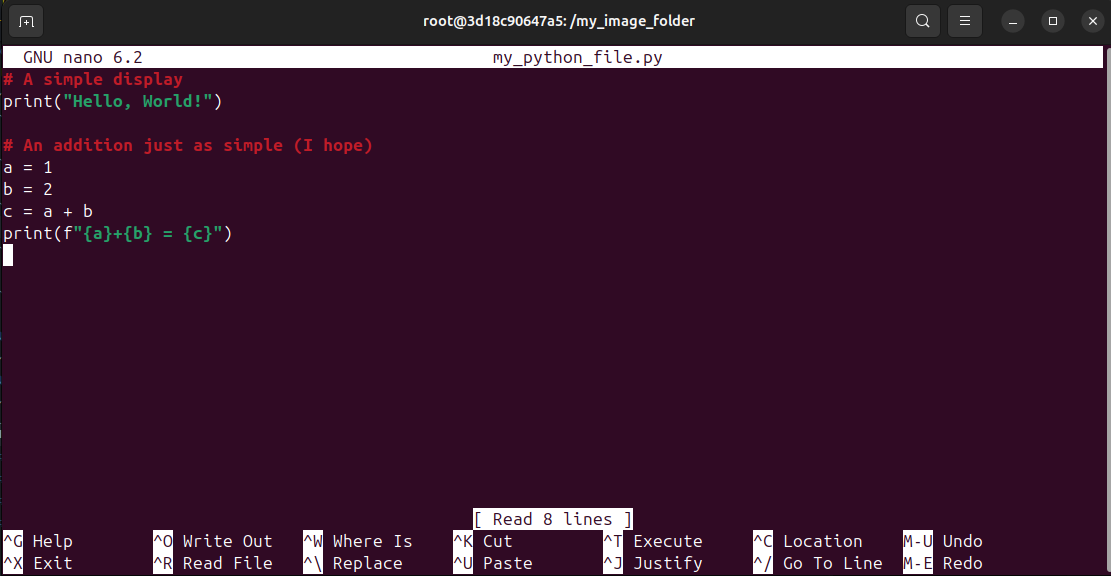
Add the modifications you want, save, and rerun:
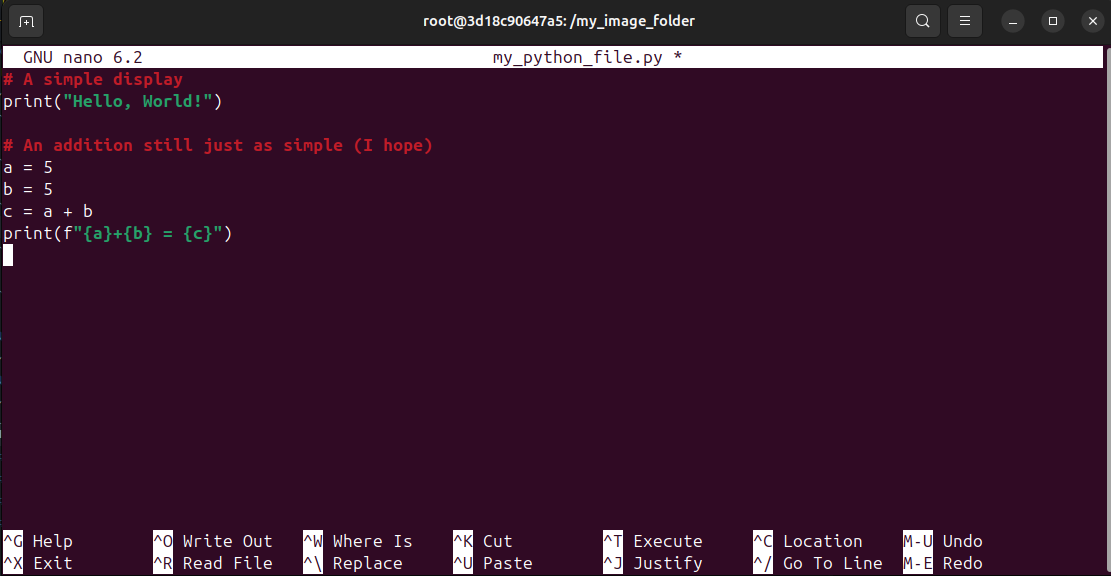
```bash {title="root@3d18c90647a5:/"}
root@3d18c90647a5:/my_image_folder# python3 my_python_file.py
Hello, World!
5 + 5 = 10
```
Your custom image works and is ready to share—simply hand over the Dockerfile and build it on any machine!
## Going further
With this tutorial, you've been able to grasp the basics of Docker—image creation, container execution, and customization via a Dockerfile. But Docker doesn't stop there: there are plenty of other features that can be explored as required.
You can, for example, share folders/files directly between the host machine and the container in real time, rather than making a copy.
We also note that in a Docker container, you are defined as root by default, so there's no need to add `sudo` to your commands (`apt install` instead of `sudo apt install`). Having full rights can pose security problems, so it's recommended to define unprivileged users with the `USER` command.
```Dockerfile
RUN useradd -m username
USER username
```
Finally, here's an excellent video from [Articulated Robotics](https://www.youtube.com/@ArticulatedRobotics) on how to craft a good Dockerfile: [YouTube](https://www.youtube.com/watch?v=RbP5cARP-SM&list=PLunhqkrRNRhaqt0UfFxxC_oj7jscss2qe&index=3&pp=iAQB)
---
## Credits
* **Writer:** [Ousmane THIONGANE](https://mowibox.github.io/)
* **Reviewer:**