Introduction to Git and GitHub – Part 2

In this second part of the introductory tutorial on Git and GitHub, you will get to the heart of the matter by manipulating the different theoretical concepts explained in the previous part.
Requirements
- Have completed Introduction to Git and GitHub – Part 1.
- Have some basic knowledge of using a terminal.
Installing Git
First, you need to install Git by visiting the official download page.
Mission
Download Git by choosing the version appropriate for your OS (Windows, Linux, Mac, …).
Creating a New Repository on GitHub

Once Git is installed, the next step is to create an account on the GitHub platform. This will allow you to initialize your first repository.
Mission
Create a GitHub account via the sign-up page.
This is where things start to get serious. I will first show you step by step the different actions to perform, then it will be your turn to reproduce them:
- To begin, I click on the “+” button located at the top left of the page. This allows me to select the “New repository” option.

- I then fill in the different details of my repository:
- Its name: To stay consistent with the previous part, I will call it “repository-mine”, but you are free to choose any name you like!
Warning
Spaces are not allowed in the repository name: it can only contain ASCII letters, digits, and the characters “.”, “_”, and “-”.
- Its description: To describe in one or two lines what the project will be about.
- Its visibility: On GitHub, you can choose to make a repository public or private. A public repository will be visible to anyone viewing your profile, while a private repository will only be accessible to you (or to people you authorize). For the purpose of this tutorial, I make mine public, but once again, you are free to choose the option that suits you.
- Its name: To stay consistent with the previous part, I will call it “repository-mine”, but you are free to choose any name you like!

Note that I also check the option to add a README to my repository. A README is a file containing a presentation of the project and essential information to understand its purpose and usage. I will go into more detail about it another time since it is not the core of this tutorial, but it is strongly recommended to check this option each time you create a repository.
Finally, all that’s left to do is click on “Create repository” and admire my brand new repository!

Mission
Follow the steps detailed above to create a repository.
SSH Configuration
SSH (Secure Shell) is a secure protocol that allows encrypted communication with a remote server, in particular to interact with GitHub without having to enter your credentials for each operation. Since the way to configure SSH differs depending on whether you are on Windows or Linux/Mac, this section is broken down into several parts. In each of them, I show you how to configure SSH for the corresponding operating system. You can therefore follow the section adapted to your environment.
Configure SSH on Windows
- Open the “Git Bash” application to access the command-line terminal.
- Generate an SSH key by entering the following command:
Mowibox@CHROMA MINGW64 ~
$ ssh-keygen -t ed25519 -C "your_email@example.com"
You can press “Enter” two or three times to accept the default file location and not set a passphrase (optional).
- Enable the SSH agent and add the SSH key with the following command:
Mowibox@CHROMA MINGW64 ~
$ eval "$(ssh-agent -s)"
ssh-add ~/.ssh/id_ed25519
The next step is to add the key you just generated to GitHub. To do so, run the following command:
Mowibox@CHROMA MINGW64 ~
$ cat ~/.ssh/id_ed25519.pub
You will get an output in your terminal corresponding to your key (it starts with ssh- and ends with your email address). Copy this output entirely.
On GitHub, click on your profile icon in the top-right corner and access the SSH settings by clicking on “Settings” then “SSH and GPG keys”.
Then click on “New SSH Key”. Give your key a title, set the key type to “Authentication Key”, paste the previously copied output into the dedicated field, and add the key to GitHub.
And that’s it! You can also verify that the SSH connection is properly established with GitHub using the following command:
Mowibox@CHROMA MINGW64 ~
$ ssh -T git@github.com
You will then see a connection confirmation message. Enter “yes,” and if everything went well, you should see the following display:
Hi Mowibox! You've successfully authenticated, but GitHub does not provide shell access.

Mowibox@CHROMA MINGW64 ~
$
Configure SSH on Linux
Open a terminal using the shortcut “CTRL + Alt + T”.
Generate an SSH key by entering the following command:
mowibox@chroma:~$ ssh-keygen -t ed25519 -C "your_email@example.com"You can press “Enter” two or three times to accept the default file location and not set a passphrase (optional).
- Enable the SSH agent and add the SSH key with the following command:
mowibox@chroma:~$ eval "$(ssh-agent -s)"
ssh-add ~/.ssh/id_ed25519
The next step is to add the key you just generated to GitHub. To do so, run the following command:
mowibox@chroma:~$ cat ~/.ssh/id_ed25519.pubYou will get an output in your terminal corresponding to your key (it starts with ssh- and ends with your email address). Copy this output entirely.
On GitHub, click on your profile icon in the top-right corner and access the SSH settings by clicking on “Settings” then “SSH and GPG keys”.
Then click on “New SSH Key”. Give your key a title, set the key type to “Authentication Key”, paste the previously copied output into the dedicated field, then add the key to GitHub.
And that’s it! You can also verify that the SSH connection is properly established with GitHub using the following command:
Mowibox@CHROMA MINGW64 ~
$ ssh -T git@github.com
You will then see a connection confirmation message. Enter “yes,” and if everything went well, you should see the following display:
Hi Mowibox! You've successfully authenticated, but GitHub does not provide shell access.

Mowibox@CHROMA MINGW64 ~
$
Configure SSH on Mac
Open a terminal using the shortcut “Cmd + Alt + T”.
Generate an SSH key by entering the following command:
mowibox@chroma:~$ ssh-keygen -t ed25519 -C "your_email@example.com"You can press “Enter” two or three times to accept the default file location and not set a passphrase (optional).
- Enable the SSH agent and add the SSH key with the following command:
mowibox@chroma:~$ eval "$(ssh-agent -s)"
ssh-add --apple-use-keychain ~/.ssh/id_ed25519
The next step is to add the key you just generated to GitHub. To do so, run the following command:
mowibox@chroma:~$ cat ~/.ssh/id_ed25519.pubYou will get an output in your terminal corresponding to your key (it starts with ssh- and ends with your email address). Copy this output entirely.
On GitHub, click on your profile icon in the top-right corner and access the SSH settings by clicking on “Settings” then “SSH and GPG keys”.
Then click on “New SSH Key”. Give your key a title, set the key type to “Authentication Key”, paste the previously copied output into the dedicated field, then add the key to GitHub.
And that’s it! You can also verify that the SSH connection is properly established with GitHub using the following command:
Mowibox@CHROMA MINGW64 ~
$ ssh -T git@github.com
You will then see a connection confirmation message. Enter “yes,” and if everything went well, you should see the following display:
Hi Mowibox! You've successfully authenticated, but GitHub does not provide shell access.

Mowibox@CHROMA MINGW64 ~
$
Mission
Configure GitHub authentication using SSH.
Cloning the Repository Locally on Your Machine
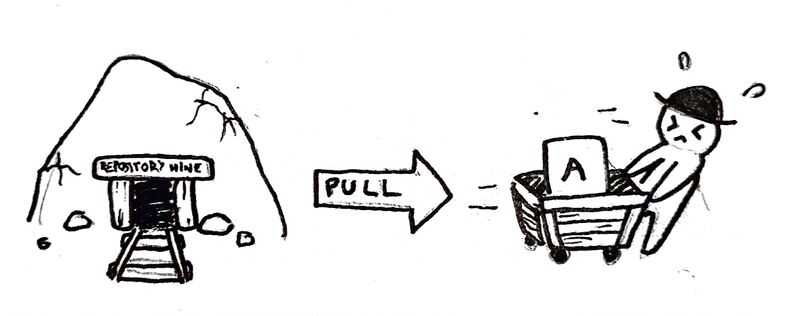
 The cart is equivalent to the local copy of the repository.
Now that everything is configured, go back to the repository. At the moment, your repository is only accessible on GitHub. It will be more practical to have a local copy on your computer to add your files, modifications, etc. This is the main objective of this section.
Regardless of your operating system, you can copy the GitHub link associated with your repository by clicking on the green “<> Code” button and then on the “copy” icon. Make sure the copied link is the “SSH” link.

As in the previous section, the rest of this introduction is split into several parts where I show you how to clone repository-mine locally depending on the operating system used. You can therefore follow the sequence of steps corresponding to your OS.
Clone a repository on Windows
- On my computer, I choose the location where I want to clone the project folder, for example in my “Documents” folder. Once the location is chosen, I right-click in the file explorer, select “More options”, then “Git Bash Here”:

- After clicking on the “Git Bash Here” option, a terminal opens, allowing me to use Git commands:
Mowibox@CHROMA MINGW64 ~/Documents
$
Note: It is also possible to open Git Bash directly without going through the file explorer, and then manually navigate to the location of your choice using the cd command.
- With the Git console open, all that’s left is to run the
git clonecommand followed by the SSH address copied earlier. In my case, it would look like this:
Mowibox@CHROMA MINGW64 ~/Documents
$ git clone git@github.com/repository-mine.git- All that’s left is to run the command and see the folder appear in my file explorer.

Clone a repository on Linux/Mac
On my computer, I choose a dedicated location in the file explorer, for example in my “Documents” folder. With a right-click in the explorer, I select the “Open in terminal” option, which opens a terminal directly in the “Documents” location:

mowibox@chroma:~/Documents$Note: It is also possible to open a terminal directly without going through the file explorer using the shortcut “Ctrl + Alt + T” (or “Cmd + Alt + T”), and then manually navigate to the location of your choice using the cd command.
- With the terminal open, all that’s left is to run the
git clonecommand followed by the SSH address copied earlier. In my case, it would look like this:
mowibox@chroma:~/Documents$ git clone git@github.com/repository-mine.git- All that’s left is to run the command and see the folder appear in my file explorer.

Mission
Clone your newly created repository locally on your machine.
Making Changes to the Project

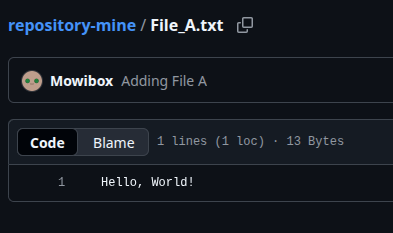
When entering the folder, you should see the “README.md” file. Inside this directory, you can create all the folders or files you need for your project. In mine, I will create a simple text file named File_A.txt, in which I write the following text:
Hello, World!Mission
Create one or more files inside the repository. Feel free to be creative with the content!
Now that my file is in place, you can note that… it does not appear on GitHub. Indeed, you need to run a series of commands to add it to the remote repository (on GitHub).
To do this, I open a terminal inside the repository in the same way as explained previously. Then, I run the following commands:
git add .The
git add .command adds all created or modified files to the staging area. The.tells Git to include all changes present in the current directory and its subdirectories.
git commit -m "Message"The
git commit -m "Message"command records and validates the changes added withgit add. In general, you should always add a descriptive message for the modification using the-m "Explanatory message"flag. For example:git commit -m "Adding File A" "Ajout du Fichier A" means Adding File A in French!.
git pushThe
git pushcommand sends the commits to the remote repository, i.e., GitHub.
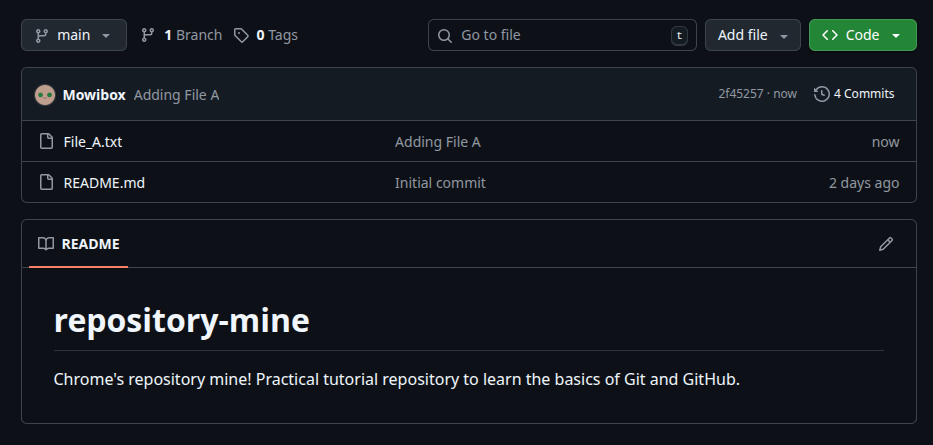
After completing the steps illustrated above, I can finally see my File_A.txt file, the message commit and its content on GitHub:
Mission
Use the add, commit, and push commands to upload your changes to the remote repository.
Don’t forget to specify a message with -m "Message" when committing!
Tip
If someone has a local copy of your repository on their computer, they can retrieve the latest changes using the git pull command.
When you open a repository, always run this command first to make sure you have the most up-to-date version.
Deleting Files from the Project
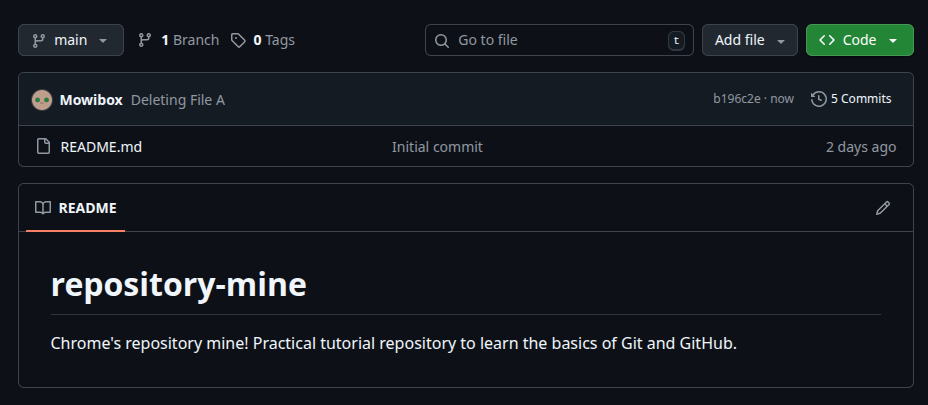
Just like adding files, it is also possible to delete files. The command:
git rm nom_du_fichierallows you to delete a file from the project by specifying its name. As with git add, you must follow this command with git commit, then git push.
Mission
Use the rm, commit, and push commands to delete one of your project files. Don’t forget the commit message!
Tip
Another deletion method is to delete the file manually, then use the git add . command: this amounts to adding a modification to the project, which is the deletion of the file.
Summary Table of Commands
This table summarizes all the functions seen throughout this tutorial and their purpose. Feel free to keep it handy at the beginning to familiarize yourself with the commands!
| Command | Description |
|---|---|
git pull | Retrieves the latest changes from the remote repository and updates your local copy. |
git add | Adds created or modified files to the staging area. |
git rm | Deletes a file from the project and informs Git of this deletion. |
git commit | Records the added changes with a message (-m "Message") describing the action performed. |
git push | Sends your commits to the remote repository. |
In the next part of this introduction, we will explore in more depth the features offered by Git and GitHub by tackling a more complex but very practical concept when working with others on the same project: branches & pull requests.
Credits
- Writer: Ousmane THIONGANE
- Reviewers: