# Introduction to Git and GitHub – Part 3Master GitHub's advanced collaborative features: create issues, fork a repository, work on branches, and submit pull requests.
In this final part of the Git and GitHub introduction tutorial, you will learn to master GitHub's advanced collaborative features, such as issues, branches, and pull requests, to effectively manage your contributions and those of others in a GitHub project.
## Requirements
* Have completed [Introduction to Git and GitHub – Part 2.]({{< relref "tutorials/computer_science/introduction_to_github_part2">}})
* Have some basic knowledge of [using a terminal.]({{< relref "tutorials/computer_science/using_terminal">}})
## Final Goal: The Treasure Mine
Throughout this introduction, we illustrated our explanations and manipulations using the `repository-mine`. In general, a mine is created to extract ores, veins, or treasures… Wouldn't it be a good idea to add a treasure to the `repository-mine` to give it value? With this in mind, I created a file in the repository called [`Our_Treasure.md`](https://github.com/Mowibox/repository-mine/blob/main/Our_Treasure.md):
```md {title="Our_Treasure.md"}
# Our Treasure
* "The limits of imagination are those we impose on it."
```
For now, it is not very full, I’ll admit… But it is a phrase that is close to my heart, an important principle on which I base my thinking. Since this phrase has value to me, I can consider it a treasure. It is the first stone of a much larger treasure: the next ones are up to you to add!
The final goal is to fill this shared treasure with your personal touch: it can be a quote you particularly like, a sentence that inspires you, thoughts or words that motivate you daily and that you want to share with others. This file will thus become the core of the `repository-mine` treasure, enriched by everyone's contributions.
## Issues
An issue is a discussion space associated with a repository. Specifically, it allows you to report a bug, propose an improvement, describe a problem, or ask a question. This helps contributors have a global view of the repository's problems and goals and track their resolution throughout the project.
On GitHub, all I have to do is click on the **“Issues”** tab in my repository, then on **“New Issue”**:
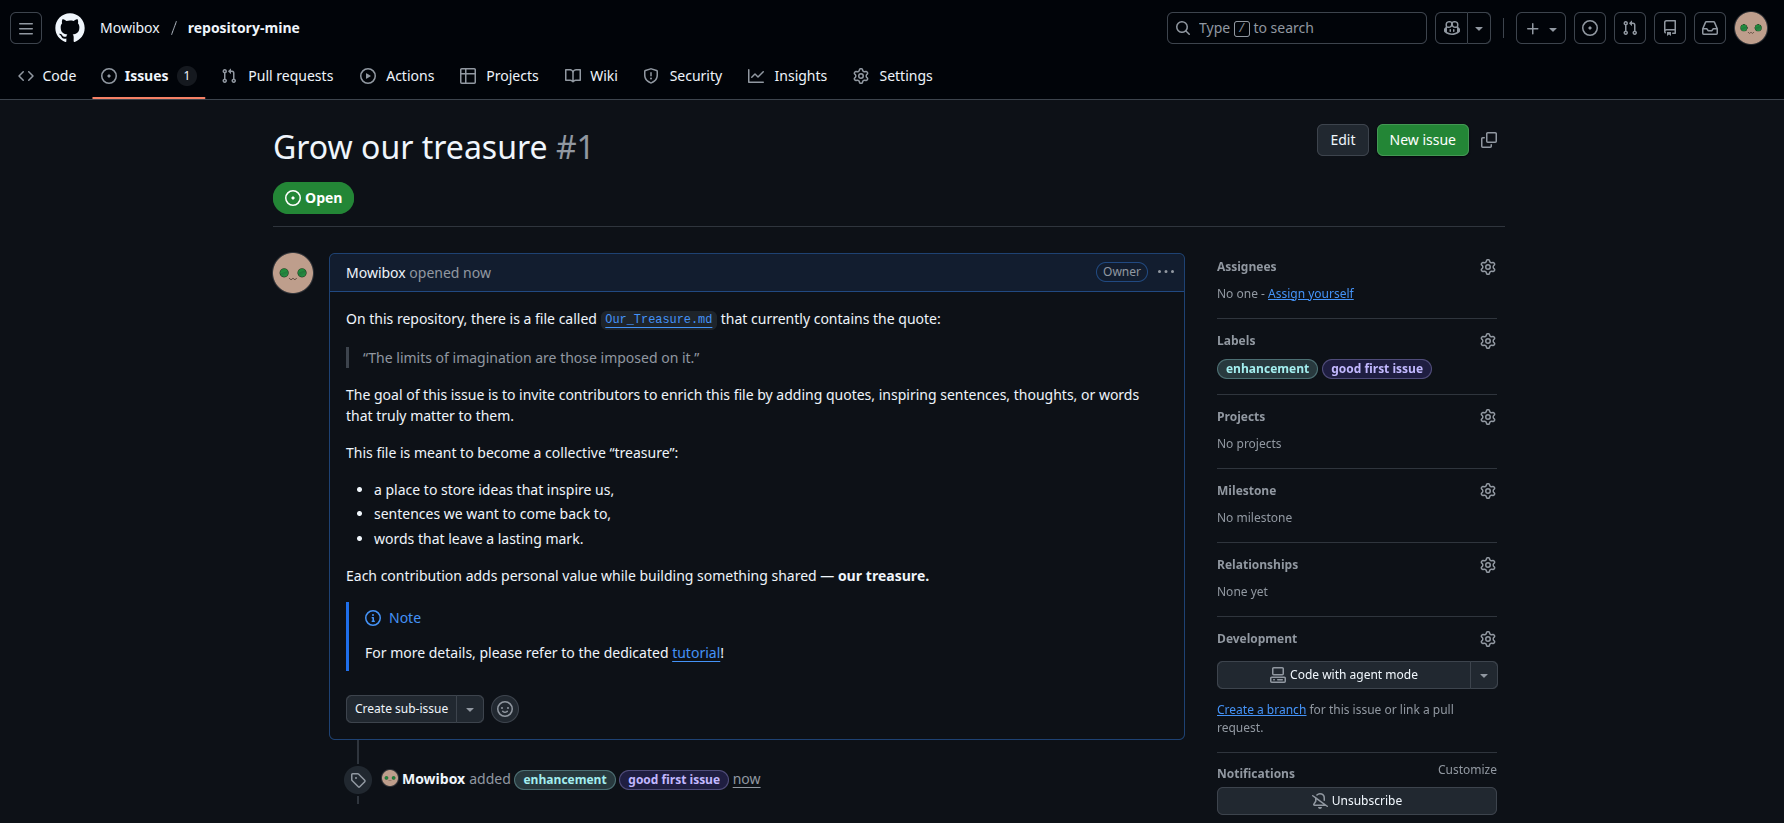 See the issue on GitHub.
In the image above, you can see the different features of an issue:
* **Title:** "Grow our treasure." The title summarizes in one sentence what the issue is about.
* **Description:** It provides more detail about the issue’s context, explaining what is expected and possibly indicating constraints or suggestions.
* **Labels:** They allow categorizing the issue. Here, the `enhancement` label indicates the issue aims to improve the base repository. The `good first issue` label shows that this is ideal for someone making a first contribution.
The next step is to modify the relevant files to enrich the shared treasure. However, since the repository was created by me, you cannot directly modify its contents. Rather than granting write access to everyone individually, GitHub offers an alternative mechanism: **the fork.**
## Forks
To illustrate how to create a fork, a new contributor is introduced: **Chromatistí.**
 Chromatistí!
"Forking" a repository means creating a complete copy of a repository in your own GitHub account. This copy, the fork, belongs to you: you can make any modifications you want. This is the most common way to contribute to a project without being the original owner.
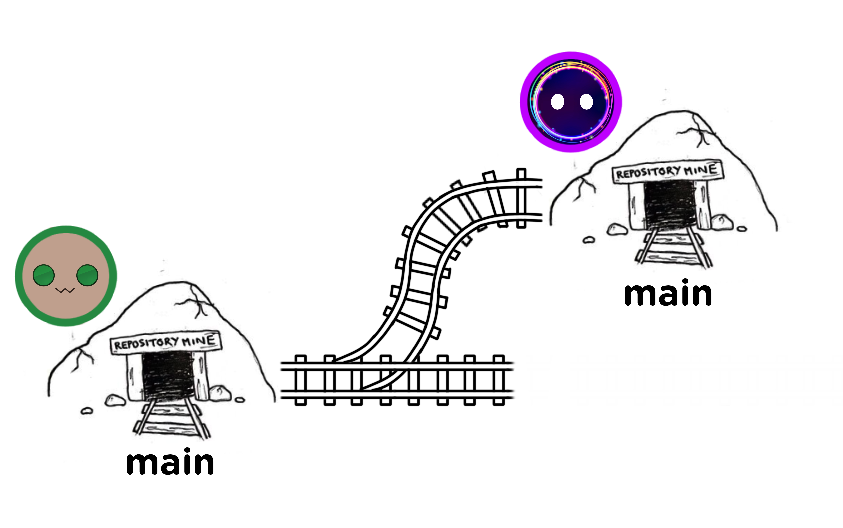 Forking a repository is like having an identical mine where you can do anything!
* To create a fork, Chromatistí goes to my repository and clicks the **"Fork"** button:

* Chromatistí then checks the fork information. Default information comes from the original repository but can be modified:
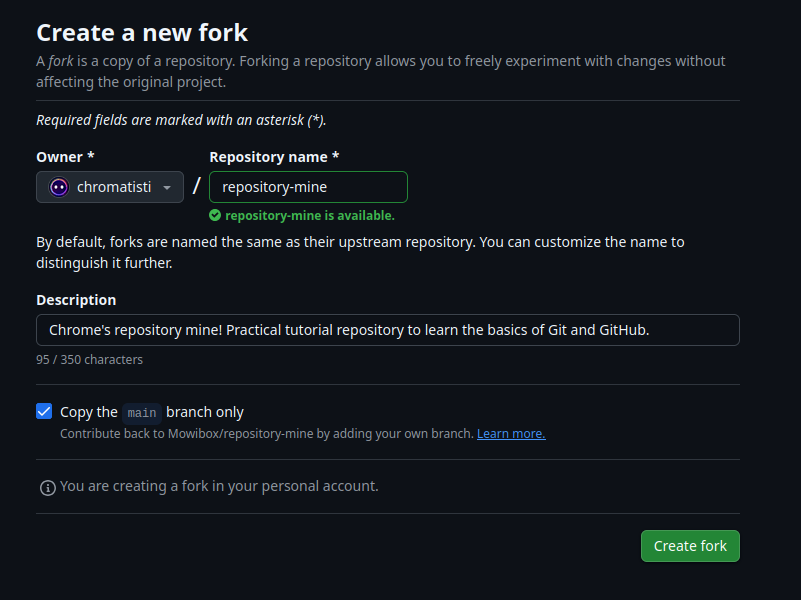
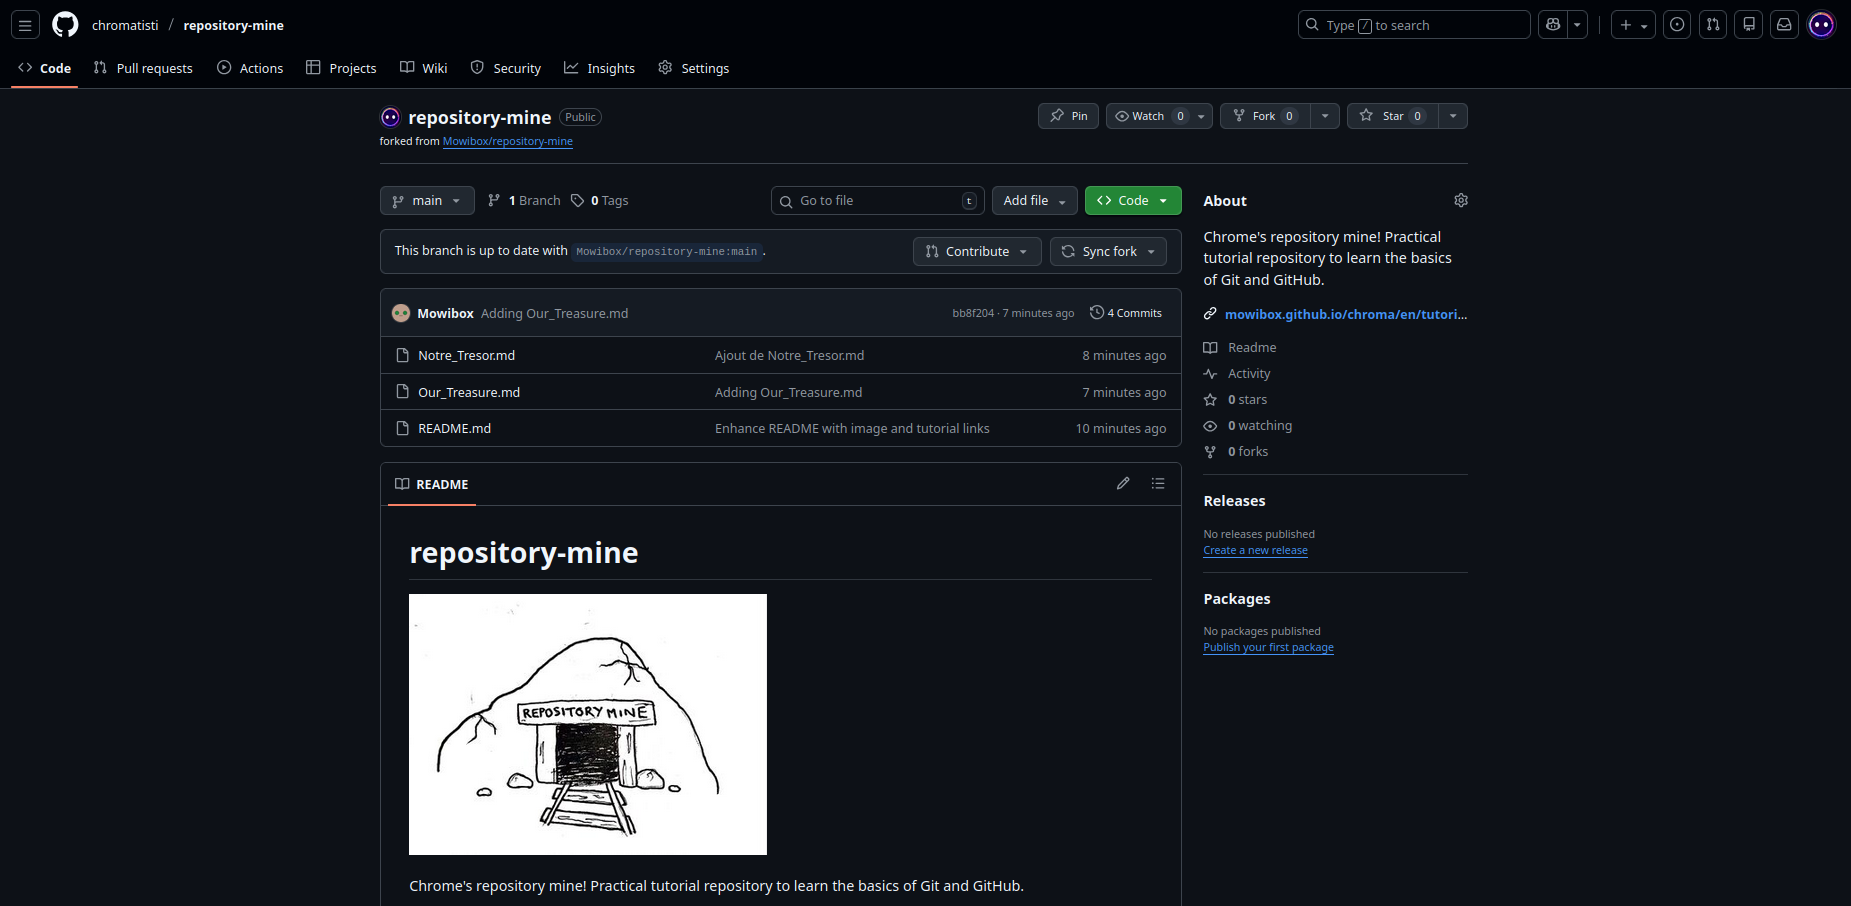
* Chromatistí clicks **"Create fork"** and finally obtains a `repository-mine` identical to the original (notice the icon next to the repository name):
{{< callout context="note" title="Mission" icon="outline/target-arrow" >}}
Create a fork of [repository-mine](https://github.com/Mowibox/repository-mine), then clone the repository to your machine.
{{< /callout >}}
## Branches
A branch is a parallel line of development that allows working on changes without affecting the main project version. Branches are useful when testing new ideas, fixing bugs, or developing new features without impacting the original project. Here, the branch will be used to modify the `Our_Treasure.md` file before integrating it into the main branch.
### Creating a branch
The command `git switch -c ` creates a new branch. For example, if Chromatistí opens a terminal on his local repository and runs:
```bash {frame="none"}
git switch -c my-treasure
```
a new branch called `my-treasure` is created and he places it there directly. The `Our_Treasure.md` file can now be modified without affecting the main branch:
```md {title="Our_Treasure.md", hl_lines=[5]}
# Our Treasure
* "The limits of imagination are those we impose on it."
* "A picture is worth a thousand words." – Confucius (Printer’s Ink, 1921).
```

To apply the changes in Git, you must use the same commands as in the previous part. The only difference is adding the `--set-upstream origin ` flag to `git push`:
```bash {frame="none"}
git add Our_Treasure.md
git commit -m "Adding my treasure to the common good"
git push --set-upstream origin my-treasure
```
The branch and its associated changes are now visible on GitHub.
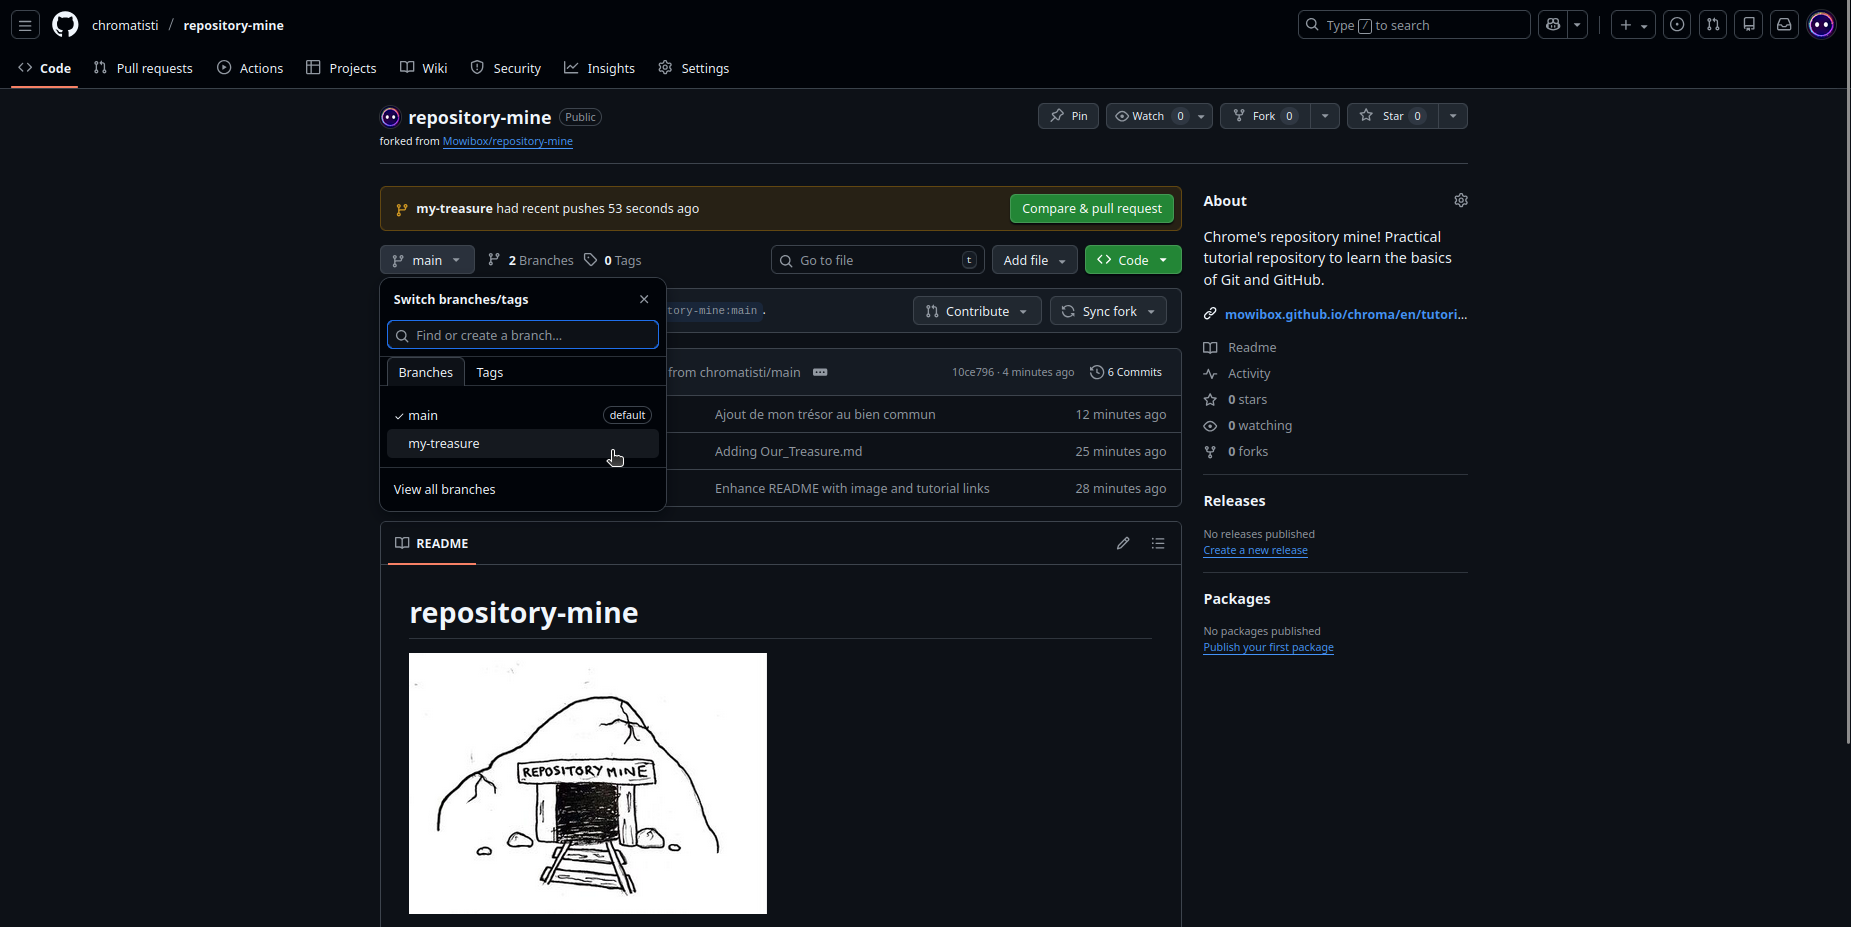 Branch change is immediately visible in the main interface.
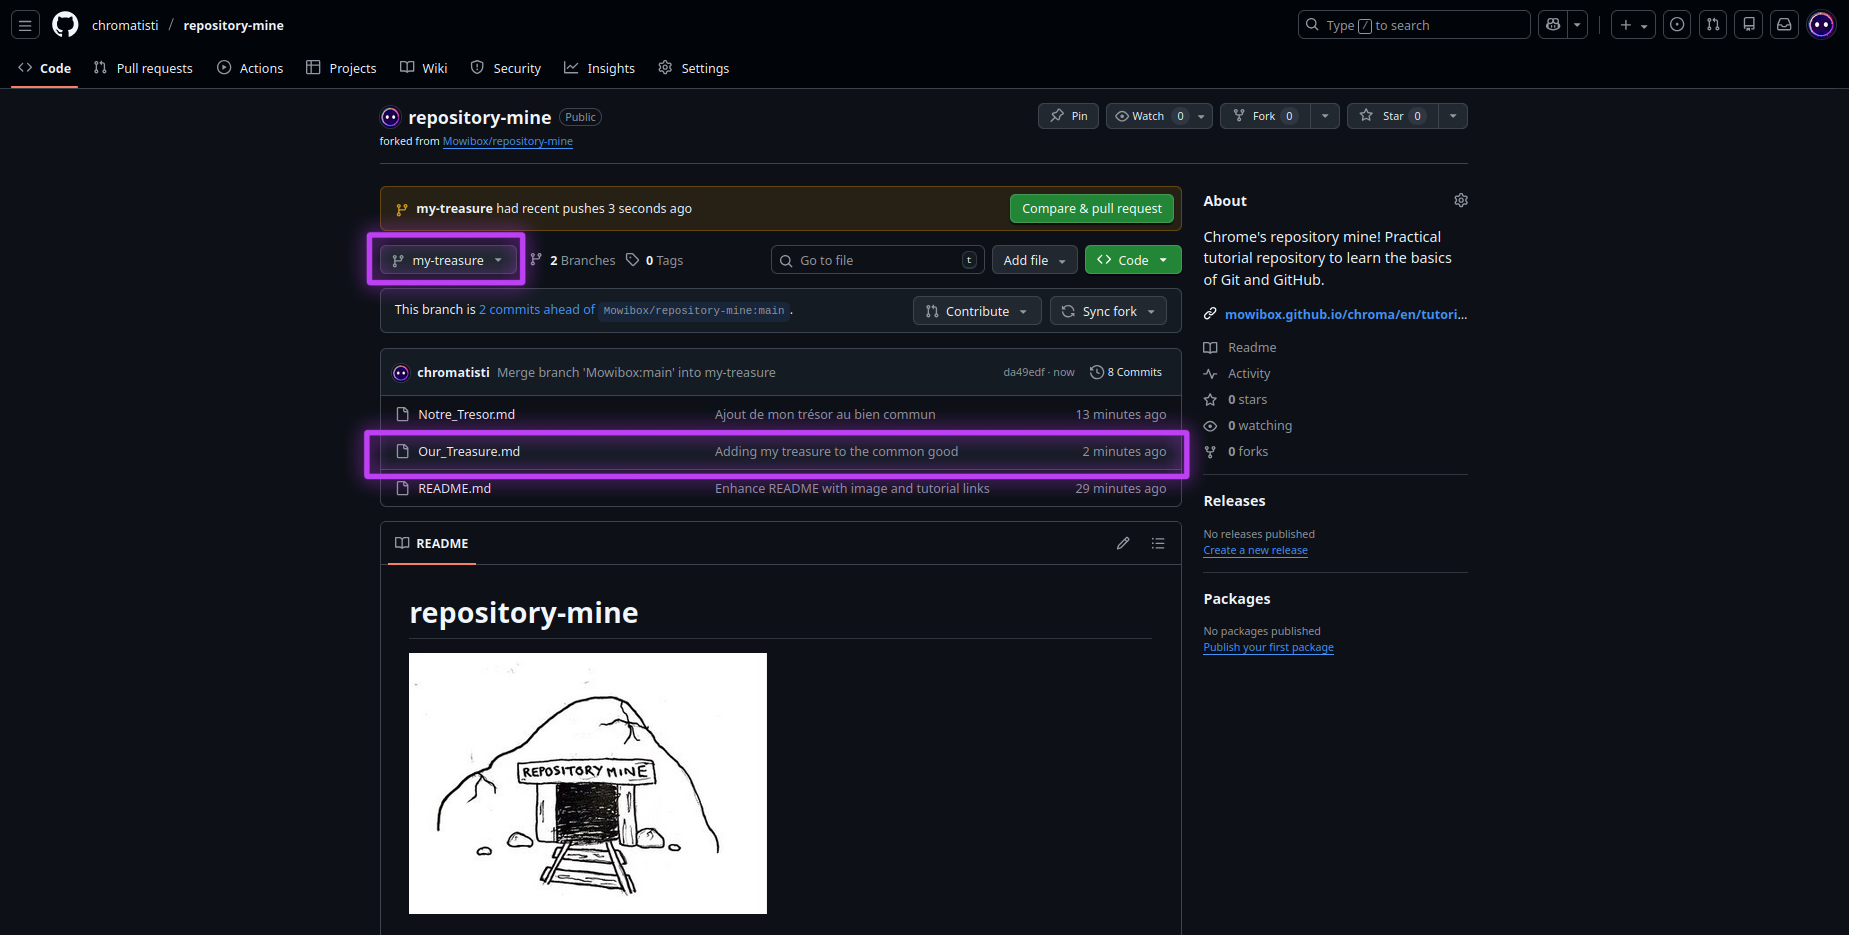 Here we see the active branch is "my-treasure" and the commit has been recorded.
{{< callout context="note" title="Mission" icon="outline/target-arrow" >}}
Create a new branch and modify the "Our_Treasure.md" file following these guidelines:
* Each contribution must start with a `*` (Markdown bullet list).
* The quote or text must be enclosed in `" "`.
* If possible, specify the source (author, work, year).
* Add only one contribution per person.
* Do not modify other contributions.
{{< /callout >}}
Use `git switch ` to switch branches. For example, to return to the main branch:
```bash {frame="none"}
git switch main
```
You will then see that the `Our_Treasure.md` file has been restored to its original state.
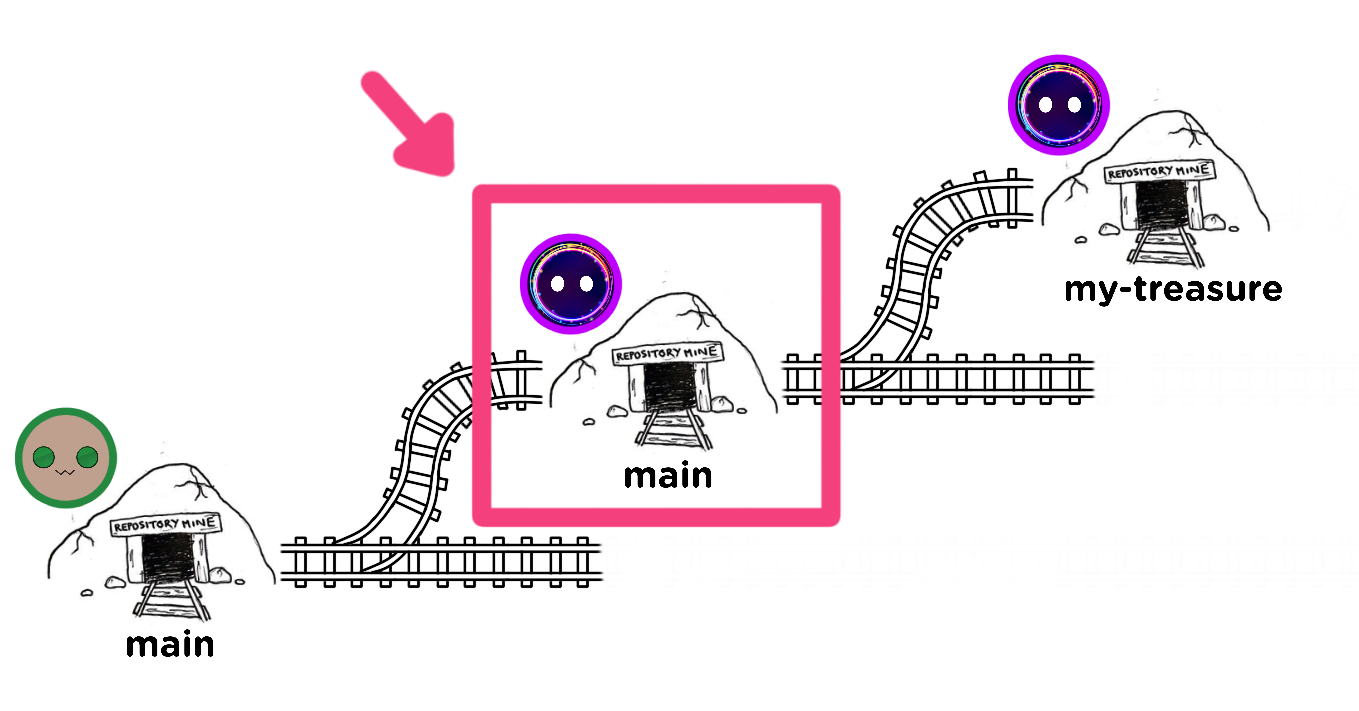 You are here!
Try switching between branches to see the different changes!
### Merging branches
Merging branches combines changes from two branches into a unified project version. Use `git merge ` to do this.
{{< callout context="danger" title="Warning" icon="outline/alert-square-rounded" >}}
To merge `` into another, you **must be on the destination branch** (the branch that will receive the changes) using `git switch `!
{{< /callout >}}
With Chromatistí, this would be:
```bash {frame="none"}
git switch main # switch to main branch
git merge my-treasure
```
Changes from the `my-treasure` branch now appear on the `main` branch:
```md {title="Our_Treasure.md"}
# Our Treasure
* "The limits of imagination are those we impose on it."
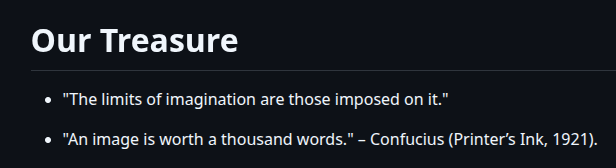
* "A picture is worth a thousand words." – Confucius (Printer’s Ink, 1921).
```
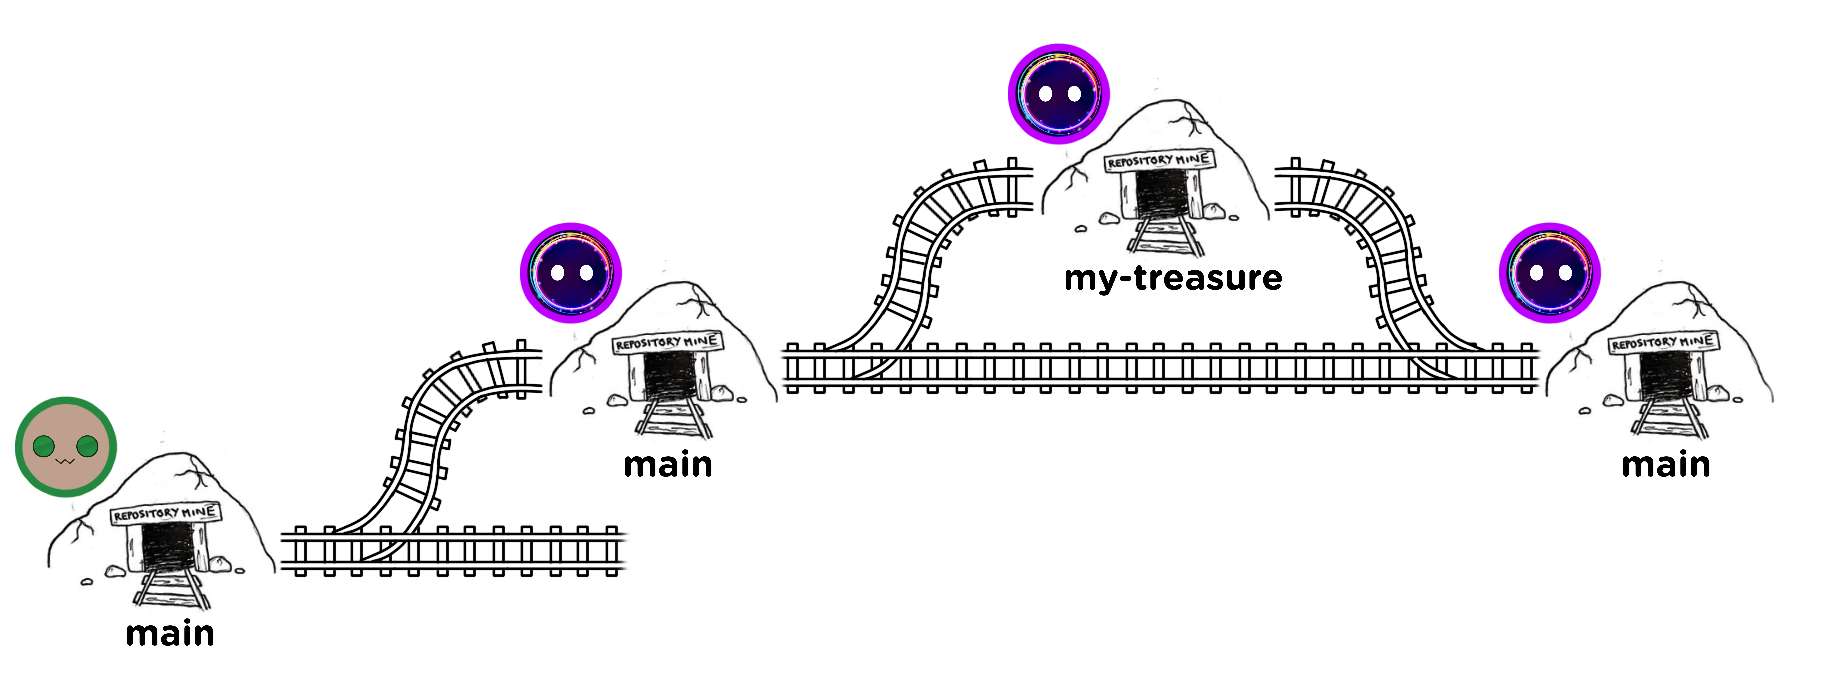 Illustratively: merging the two train branches to have only one mine.
After merging a branch, you can delete it with `git branch -d `. For Chromatistí:
```bash {frame="none"}
git branch -d my-treasure
```
Since the changes were made locally, they need to be pushed to the remote repository for them to take effect:
```bash {frame="none"}
git push
```
{{< callout context="note" title="Mission" icon="outline/target-arrow" >}}
Merge your branch into the main branch, then delete it.
{{< /callout >}}
You now have your treasure in the mine! But remember, changes were made in your fork. The final step is to include these changes in the main repository. This is the role of a **pull request**.
## Pull Requests
A pull request is a key GitHub mechanism that proposes merging changes from one branch into another, while providing a space for discussion and review before integration.
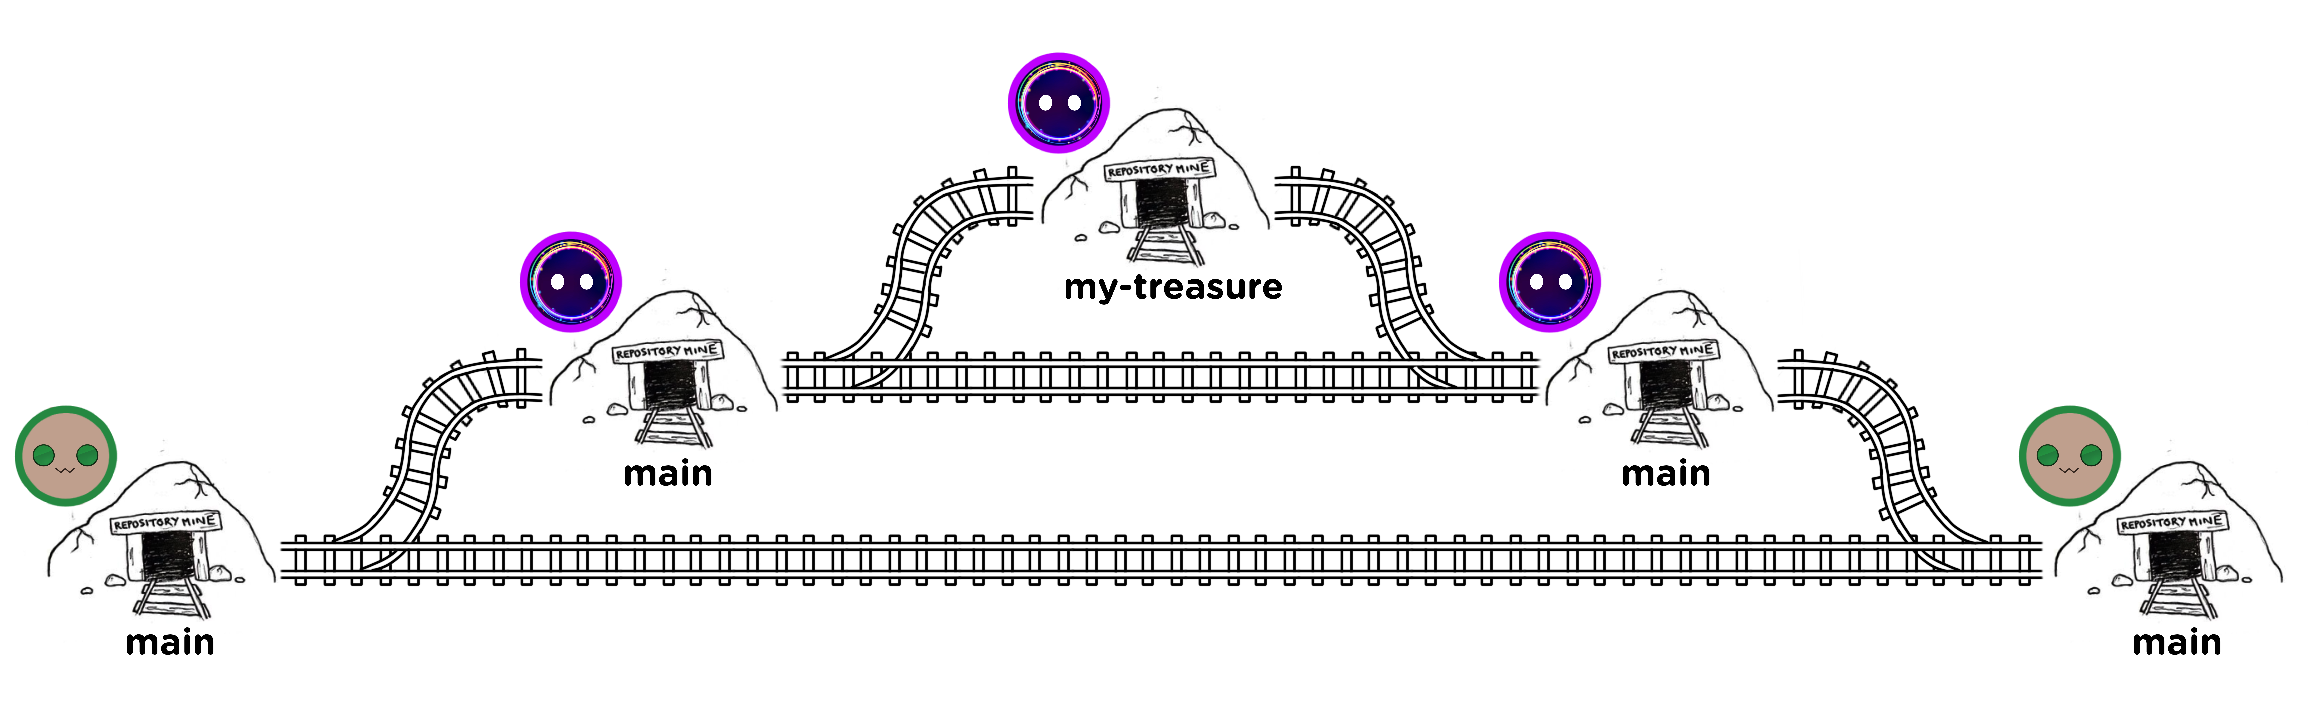 It's like asking to merge the two mines into one.
{{< callout context="tip" title="Note on branches and pull requests" icon="outline/message-dots" >}}
You may have noticed (or not) that merging a branch and creating a pull request ultimately achieve the same result: integrating changes from one branch into another (often `main`).
However, these two operations have different purposes:
* Branch merge via `git merge` is usually done locally. It is fast, direct, and involves no review, discussion, or control.
* Pull request is a GitHub-specific process that structures the merge: it allows reviewing code, discussing changes, and keeping a clear record of decisions before merging.
In practice:
* On a personal or local project, a simple `git merge` may suffice.
* In collaborative projects, a pull request is preferred, whether from a fork or a branch within the same repository when multiple contributors have write access.
{{< /callout >}}
The process happens on GitHub:
* In his fork, Chromatistí clicks **"Contribute"**, then **"Open pull request"**, opening an interface to write a title and description:
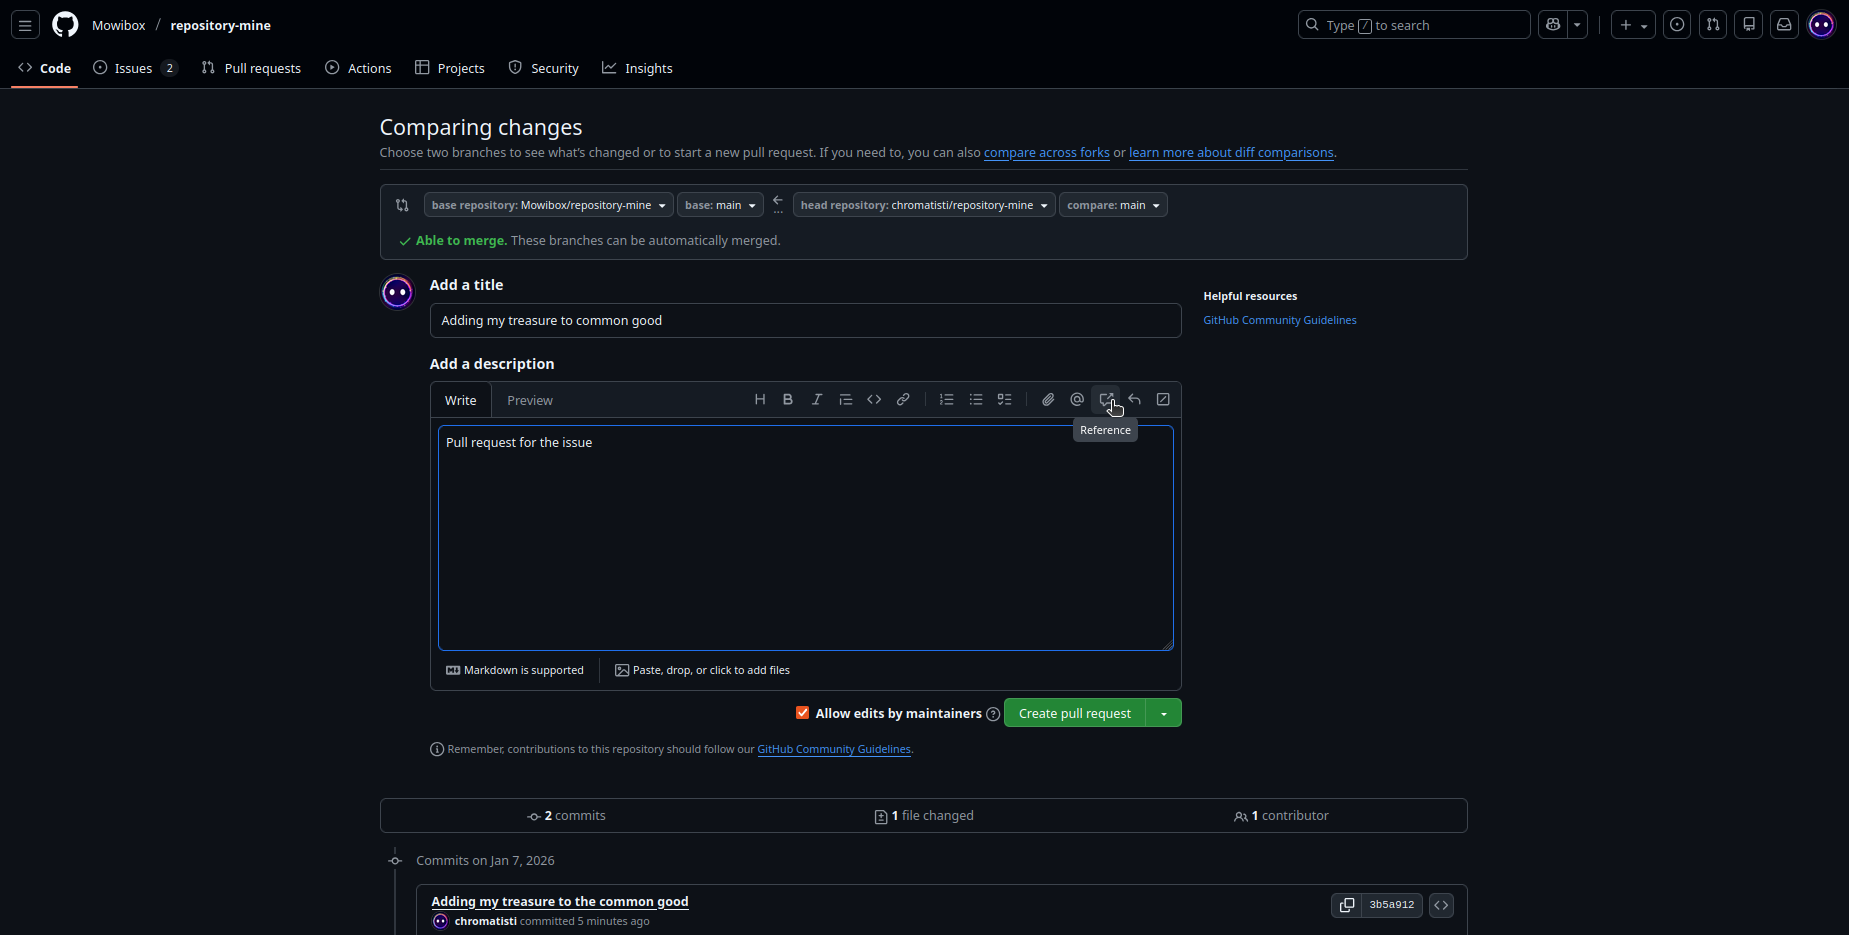
For this exercise, he can write "Pull request for issue …". For which issue? There are two ways to specify:
* Click the **"Reference"** button as shown on the above image.
* Type `#` in the description field.
In both cases, a list of issues and previous pull requests appears; just select the relevant issue (here, issue #1).
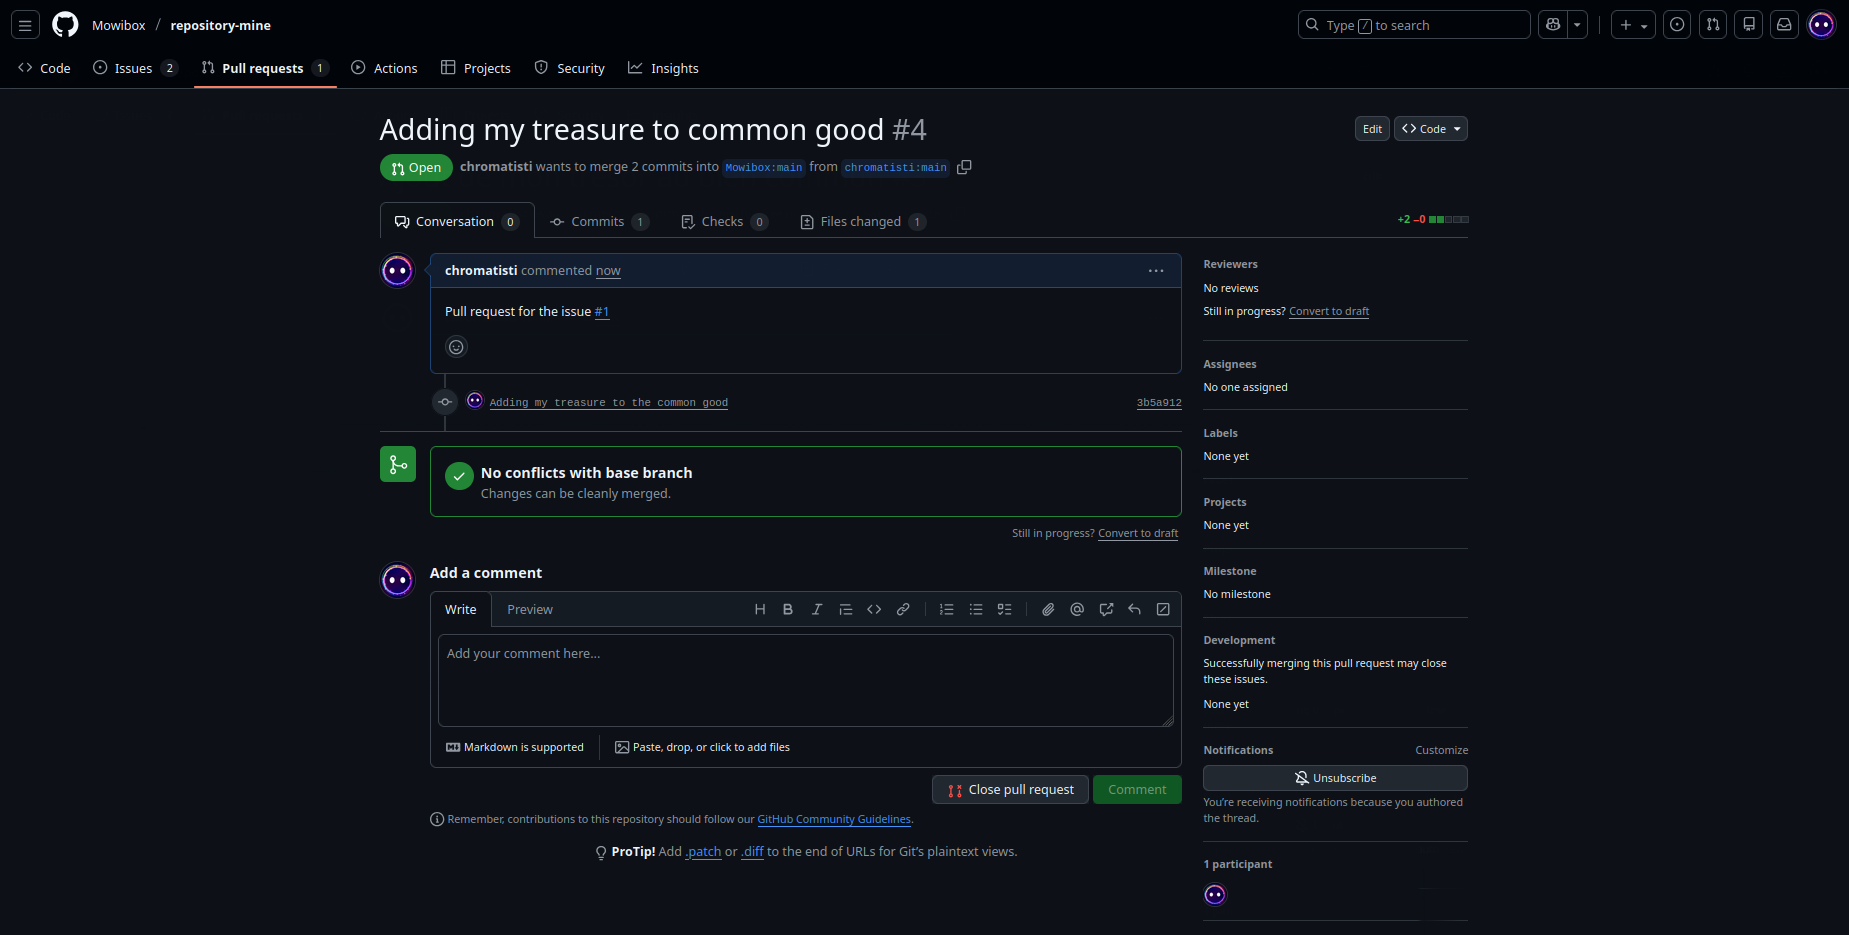
Adding a description and references provides context for the changes made, making it easier for the original repository owner to understand them.
Once the pull request is created (**"Create pull request"**), just wait for a contributor (in this case, me) to approve it:
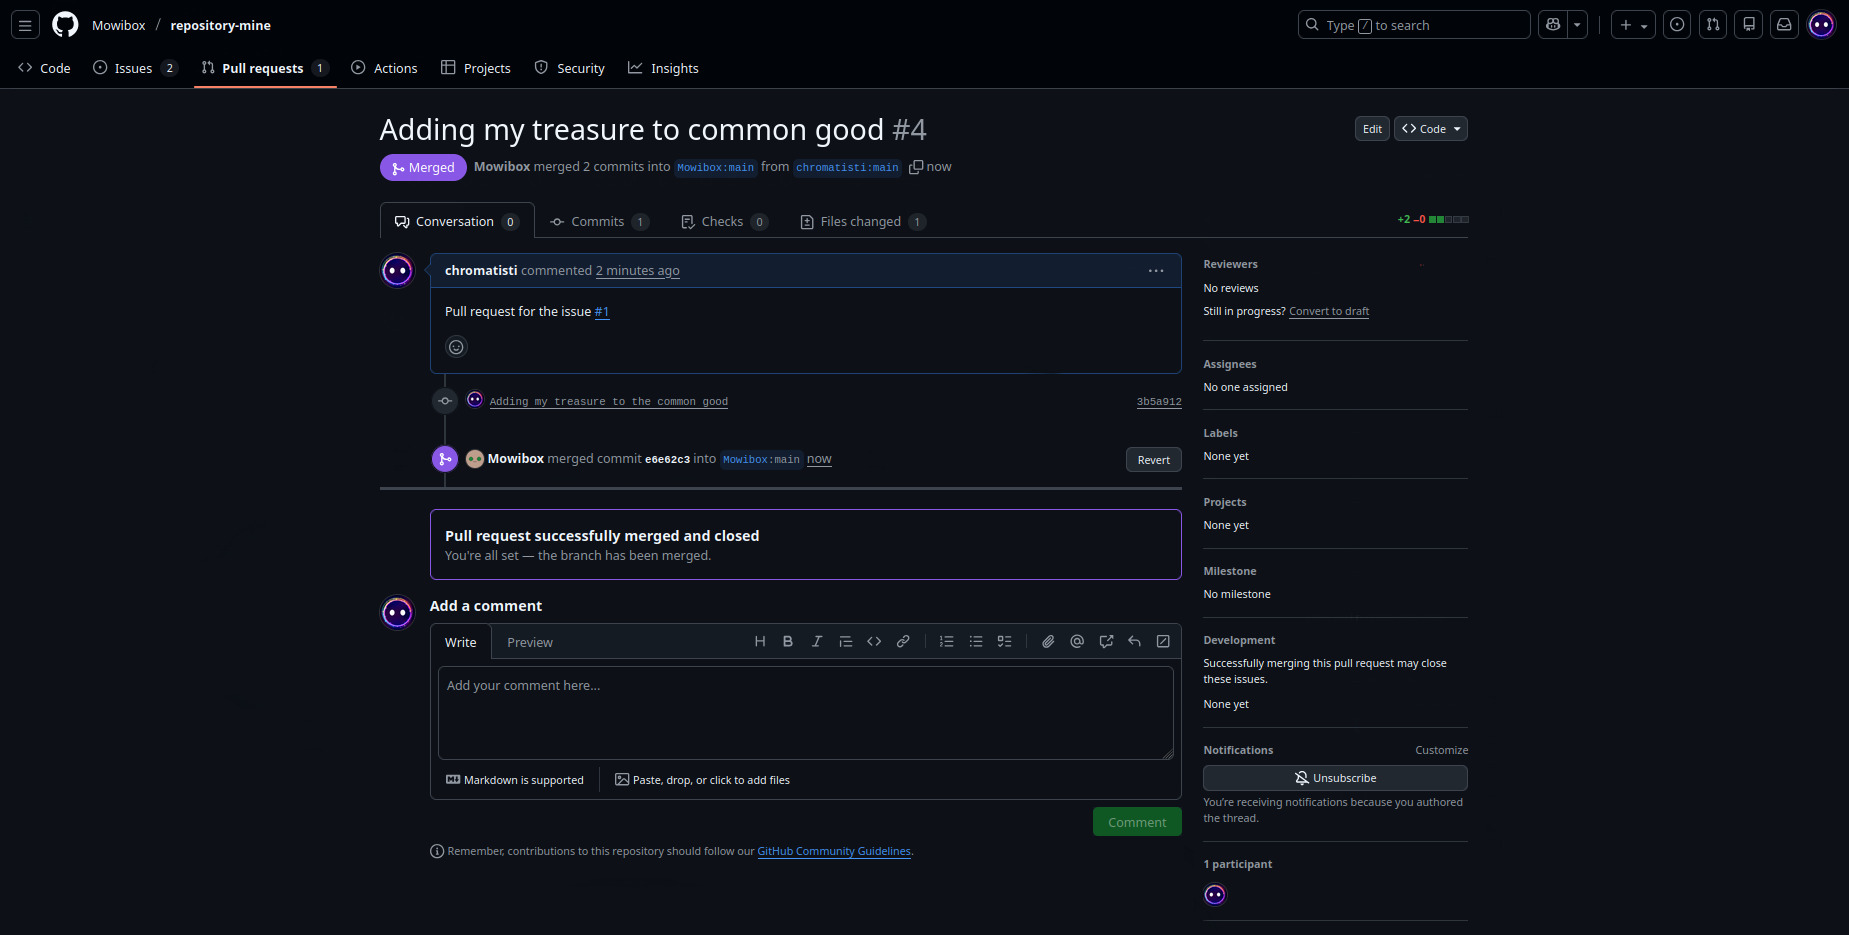
 And there you have it!
{{< callout context="note" title="Mission" icon="outline/target-arrow" >}}
Create a pull request to merge your changes into the main repository. **Don’t forget to reference the correct issue!**
{{< /callout >}}
## Going Further
## Summary Table of Commands
As in the previous part, this table summarizes all commands covered in this tutorial and their purpose. Keep it handy when getting started with Git!
| Command | Description |
| --------------------------------------------------- | ------------------------------------------------------------------------------------------ |
| [`git pull`](https://git-scm.com/docs/git-pull) | Retrieves the latest changes from the remote repository and updates your local copy. |
| [`git add`](https://git-scm.com/docs/git-add) | Adds created or modified files to the staging area. |
| [`git rm`](https://git-scm.com/docs/git-rm) | Deletes a file from the project and informs Git of this deletion. |
| [`git commit`](https://git-scm.com/docs/git-commit) | Records the added changes with a message (`-m "Message"`) describing the action performed. |
| [`git push`](https://git-scm.com/docs/git-push) | Sends your commits to the remote repository. |
| [`git switch -c `](https://git-scm.com/docs/git-switch) | Creates a new branch from the current branch and checks it out immediately. |
| [`git switch `](https://git-scm.com/docs/git-switch) | Switches the active branch in the local repository. |
| [`git push --set-upstream origin `](https://git-scm.com/docs/git-push) | Pushes the local branch to the remote repository and sets the remote branch as default (*upstream*). |
| [`git merge `](https://git-scm.com/docs/git-merge) | Merges the specified branch into the active branch. |
| [`git branch -d `](https://git-scm.com/docs/git-branch) | Deletes a local branch only if it has already been merged. |
---
## Credits
* **Writer:** [Ousmane THIONGANE](https://mowibox.github.io/)
* **Reviewers:**