# How to contribute to Chroma?This guide explains how to contribute to Chroma: suggest ideas, report bugs, write tutorials, and participate in the site's development via GitHub and Discord.

This guide is designed to walk you step by step through the process of contributing to Chroma. Whether it’s suggesting ideas, identifying issues, or writing your own pages, there is always a way to lend a hand!
## Giving Feedback: Questions & Suggestions
The first way to contribute to improving the site is by sharing your feedback and suggestions for improvement. There are two main ways to do this:
* **On Discord:** The [🔍 Review and Feedback](https://discord.com/channels/1383790297594728518/1386648737366937701) channel allows you to ask questions, discuss with other contributors, and suggest ideas to improve the site.
* **On GitHub:** If you notice a bug, don’t hesitate to create an [issue on the Chroma repository.](https://github.com/Mowibox/chroma/issues/new/choose)
## Contributing to Chroma Development
If your goal is to write a new tutorial, rewrite part of an existing one, or dive into the site's source code to help improve it, you can set up a development environment on your local computer.
### Prerequisites
* Node.js — [version 24.18.0 or higher (LTS).](https://nodejs.org/en/download)
* Hugo — [version 0.161.1](https://github.com/gohugoio/hugo/releases/tag/v0.161.1)
* Hugo extended — [version 0.161.1](https://github.com/gohugoio/hugo/releases/tag/v0.161.1)
* An IDE such as [Visual Studio Code.](https://code.visualstudio.com/)
* Basic GitHub knowledge (forks, issues, pull requests) — a [tutorial]({{< relref "tutorials/computer_science/introduction_to_github_part1">}}) is available on the site.
### Setting Up the Development Environment
First, create a fork of the [Chroma repository](https://github.com/Mowibox/chroma). Then clone your fork to your machine with `git clone`. Inside a terminal in the project directory, run the following command to install the necessary dependencies:
```bash {frame="none"}
npm install
```
This gives you access to a development server to preview the site. Still inside the project directory, run the command below to start the local development server:
```bash {frame="none"}
npm run dev
```
If everything went well, your terminal will display a message with a clickable link to your local site (at a localhost address):
```bash {title="Terminal"}
Watching for changes in /.../chroma/{assets,content,i18n,layouts,node_modules,package.json,static}
Watching for config changes in /.../chroma/config/_default, /home/mowibox/Documents/WorkspaceU/Git_folders/chroma/config/_default/menus
Start building sites …
hugo v0.164.0-ce2470e7012b5ab5fc4e10ebe4027e9f8d9e00dc+extended linux/amd64 BuildDate=2026-07-06T16:39:30Z VendorInfo=gohugoio
| EN | FR
-------------------+-----+------
Pages | 69 | 68
Paginator pages | 0 | 0
Non-page files | 2 | 2
Static files | 253 | 253
Processed images | 4 | 0
Aliases | 13 | 12
Cleaned | 0 | 0
Built in 1638 ms
Environment: "development"
Serving pages from disk
Web Server is available at http://localhost:1313/chroma/ (bind address 127.0.0.1)
Press Ctrl+C to stop
```
Click the link to browse the site in your browser. While the server is running, any saved changes will automatically update on the local preview.
{{< callout context="caution" title="Tip" icon="outline/bulb" >}}
If you encounter build or display issues, this command cleans previously generated files by Hugo (public, resources, etc.) to reset the environment before rerunning `npm run dev`:
```bash {frame="none"}
npx shx rm -rf public resources hugo_stats.json .hugo_build.lock
```
{{< /callout >}}
### Site Structure
The Chroma folders and files are organized as follows:
```text {title="Chroma Structure"}
.
├── assets/
├── config/
│ └──_default/
│ ├── hugo.toml
│ ├── menus.toml
│ ├── module.toml
│ └── params.toml
├── content/
│ ├── en/
│ └── fr/
| ├── blog/
| ├── computer_vision/
| └── tutorials/
├── i18n/
├── layouts/
└── static/
├── gifs/
├── icons/
└── images/
```
* `assets/` contains source resources (SCSS, JavaScript, styles, etc.) used by the site.
* `config/` contains configuration files and general settings.
* `content/` holds all site pages, organized by language (`en/` and `fr/`).
* `i18n/` contains translation files.
* `static/` contains static files (images, gifs, icons, etc.).
Generally, the `tutorials/` folder is the main focus, subdivided into four categories: Computer Science (`computer_science/`), Electronics (`electronics/`), 3D Design & Development (`design_3d_development/`), and Miscellaneous (`miscellaneous/`). Contributions may also involve other parts of the site, e.g., known [issues.](https://github.com/Mowibox/chroma/issues)
### Writing a Tutorial
The following section details the steps to create and format a new tutorial:
| Step | Description |
| ------------------------------------------------------------------------------- | ------------------------------------------------------------------ |
| [VSCode Extensions](#vscode-extensions-useful-for-site-development) | Install useful extensions for site development |
| [Adding the Tutorial](#adding-the-tutorial-to-the-folders) | Create the folder and `index.md` file for your tutorial |
| [Front-Matter](#front-matter) | Fill out the front-matter (title, description, date, weight, etc.) |
| [Weight Convention](#weight-convention) | Define the tutorial's order using the `weight` field |
| [Content Formatting](#content-formatting) | Write the tutorial in Markdown using the recommended structure |
| [Adding Images](#adding-images) | Add images to the appropriate folders and reference them correctly |
| [Page Credits](#page-credits) | Add a credits section at the bottom of the tutorial |
#### VSCode Extensions Useful for Site Development
If you use VSCode, here is a non-exhaustive list of extensions that can help properly format your files:
* [HTML CSS Support](https://marketplace.visualstudio.com/items?itemName=ecmel.vscode-html-css)
* [Hugo Language and Syntax Support](https://marketplace.visualstudio.com/items?itemName=budparr.language-hugo-vscode)
* [Markdown All in One](https://marketplace.visualstudio.com/items?itemName=yzhang.markdown-all-in-one)
* [markdownlint](https://marketplace.visualstudio.com/items?itemName=DavidAnson.vscode-markdownlint)
#### Adding the Tutorial to the Folders
To create a tutorial, create a folder containing an `index.md` file. First identify the theme of your tutorial to place it in the correct folder (Computer Science, Electronics, etc.). The URL of your page will match the folder name. There is two rules for folder naming:
* The folder name must be in **English** to simplify fr/en localization.
* Keep folder names reasonably short.
You can use the command `hugo new content content//index.md` to create the page directly with its path.
**Example:** The tutorial "Introduction to Embedded Programming" is a English electronics tutorial. The folder `introduction_to_embedded_prog/` and its `index.md` file were created in `content/en/tutorials/electronics/` using:
```bash {frame="none"}
hugo new content content/en/tutorials/electronics/introduction_to_embedded_prog/index.md
```
The URL will be: `https://mowibox.github.io/chroma/en/tutorials/electronics/introduction_to_embedded_prog/`
```text {title="Tutorial Folder Structure"}
.
└── en/
├── blog/
├── computer_vision/
└── tutorials/
├── computer_science/
├── design_3d_development/
└── electronics/
└── introduction_to_embedded_prog/
└── index.md
```
#### Front-Matter
Each tutorial page starts with front-matter, enclosed by `---`. Fields are as follows:
```md
---
title: ""
description: ""
summary: ""
date:
lastmod:
draft: false
weight:
toc: true
icon: ""
contributors: [""]
categories: [""]
tags: ["", ""]
seo:
title: ""
description: ""
canonical: ""
noindex: false
robots: "index, follow"
---
```
* `title`: This is the title of your tutorial. I think that's pretty self-explanatory, right?
* `description`: Describe your content in **one short sentence.** Used in particular for the preview in the list of tutorials.
* `summary`: Describe your tutorial in a little more detail, in 2-3 sentences.
* `date`: The date you started writing your tutorial, **in YYYY-MM-DD format.**
* `lastmod`: The date the tutorial was last modified, **in YYYY-MM-DD format.**
* `draft`: Makes the tutorial visible or invisible during preview. By default, it is visible (`true`).
* `weight`: Defines the display order of your content in the list of tutorials. How to fill it in is detailed in the [next section.](#weight-convention)
* `toc`: Displays the table of contents for the page. By default, it is displayed (`true`).
* `icon`: You can add a new icon by going to [Tabler Icons](https://tabler.io/icons). This will be the icon that illustrates your page in the list of tutorials {{< callout context="danger" title="Warning" icon="outline/alert-square-rounded" >}}
Please note that the icon color must be **#a514e9** and must be added to the `static/icons` folder.
{{< /callout >}}
* `contributors`: Lists the people who wrote or contributed to the page. Multiple contributors can be listed, separated by commas.
* `categories`: The tutorial’s main category. One category is usually sufficient: it’s used to group tutorials by broad topic (e.g., `embedded-systems`, `devops`, `version-control`). {{< callout context="caution" title="Tip" icon="outline/bulb" >}}
Check existing categories before creating a new one to avoid duplicates!
{{< /callout >}}
* `tags`: More specific keywords related to the tutorial’s content and format. Unlike `categories`, multiple tags can be entered (at least 2 or 3) to refine the search by topic.
* `seo.title`: Title optimized for search engines. It may differ from `title`.
* `seo.description`: Description displayed in search engine results.
* `seo.canonical`: Canonical URL of the page
* `seo.noindex`: Manages the indexing of the page by search engines. Enabled by default (`false`).
* `seo.robots`: Tells search engines how to index the page.
 Example of a tutorial preview in the list. Fields title, description, and icon are used.
{{< callout context="caution" title="Tip" icon="outline/bulb" >}}
Do not hesitate to check existing tutorial front-matter to see how to fill yours!
{{< /callout >}}
#### Weight Convention
Tutorial order is defined in the front-matter using the `weight` field. Currently, this value is manually managed (by myself). You can leave it empty, or launch the site locally, identify tutorials near your desired position, and adjust weights accordingly.
#### Content Formatting
Write your content mainly in [Markdown,](https://en.wikipedia.org/wiki/Markdown) which is easy to learn. Markdown is also used for [README files](https://github.com/Mowibox/chroma/blob/main/README.md) on GitHub.
To go further and take advantage of all the site's features, the Doks documentation offers detailed guides on content creation:
* [Authoring content](https://getdoks.org/docs/basics/authoring-content/) explains text structuring, headings, paragraphs, lists, etc.
* Use [shortcodes](https://getdoks.org/docs/basics/shortcodes/) for notes, tips, buttons, and dynamic content.
* For writing code, see [Code blocks.](https://getdoks.org/docs/built-ins/code-blocks/)
* For mathemarical expressions, use [Math support.](https://getdoks.org/docs/built-ins/math/)
* Diagrams and schematics are possible via [Diagrams.](https://getdoks.org/docs/built-ins/diagrams/)
Feel free to combine Markdown features and Doks shortcodes to give your tutorial a visual identity. And speaking of visuals, here’s the section about images!
#### Adding Images
All images on the site dedicated to pages are stored in the [`static/images/`.](https://github.com/Mowibox/chroma/tree/main/static/images) folder. To integrate an image from the folder into your page, adapt the following HTML block to your needs:
```html {title="Adding Images"}

```
Where `image1.jpg` is the name of the image. If you want to add a new image, simply add the image in question to the `static/images/` folder so that it can be used. As with the rest of the site, there are certain points to bear in mind when adding images:
* The image must **not exceed 2 MB.**
* The image used must be **royalty-free.**
* It is preferable to **name the image in relation to the tutorial you are writing.** For example, the images in this tutorial are named `contribute1.jpg`, `contribute2.png`, etc. This makes it easier to find which tutorial the image is used in.
* If certain images can be used in several tutorials, you can give them a more generic name, while adding an underscore (`_`) at the beginning to distinguish them (e.g., `_buzzer.jpg`).
* The `alt` field must contain a **very short description of the image content in English.**
You can also add a caption to your image using the HTML block below:
```html {title="Image with Caption"}
 An image with a caption.
```
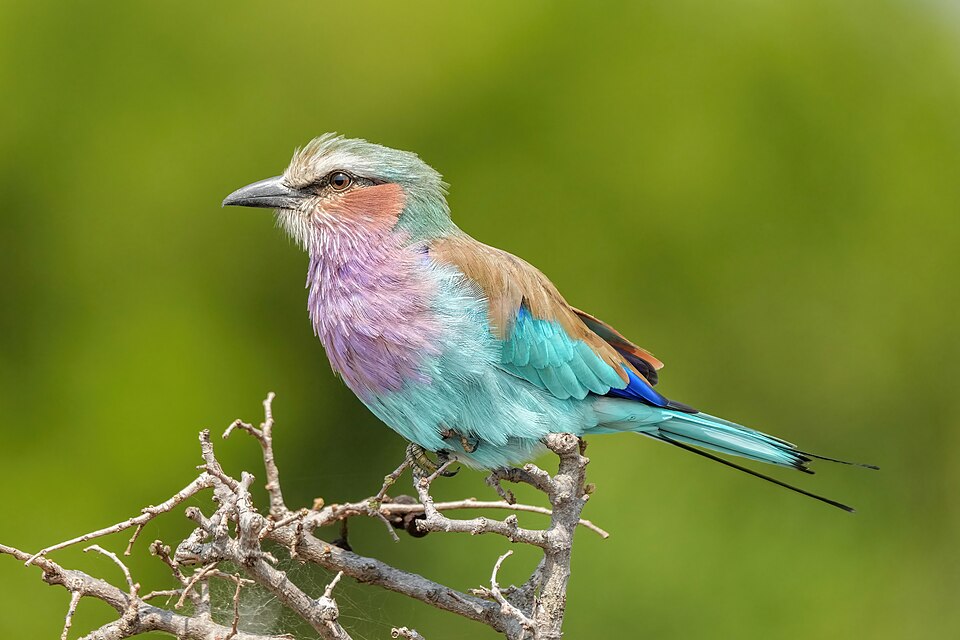 An image with a caption.
{{< callout context="caution" title="Tip" icon="outline/bulb" >}}
Gifs and icons follow the same rules (`static/icons/`, `static/gifs/`).
{{< /callout >}}
#### Page Credits
At the end of each page of the site (such as this one), a section dedicated to page credits must be added. Here is the format:
```md {title="Credits Format"}
---
## Credits
* **Writer:**
* **Reviewer:**
```
* **Writer:** You! There may be several authors, separated by commas.
* **Reviewer:** These are the people who proofread your tutorial and offered suggestions. There is no need to indicate this if you are the author. If you do not have proofreaders, the field can be left blank, but it must be present in all cases.
## Requesting a Review
Satisfied with your tutorial? All you have to do now is make a pull request so that a collaborator can check the tutorial! The title of the pull request should be clear, for example:
* "Add tutorial "Introduction to Python" - EN"
* "Suggested correction in the tutorial "Utilisation du terminal" - FR"
* "Improvement to the tutorial viewing interface"
* etc.
The pull request description should briefly explain the modifications or additions. A contributor will check that all points are respected. If not, you will receive feedback to make changes. Once correct, the changes will be merged into the main site.
**Congrats and thank you!**
---
## Credits
* **Writer:** [Ousmane THIONGANE](https://mowibox.github.io/)
* **Reviewer:**