Perform a dual-boot with Windows
A dual-boot is a method that allows you to install two operating systems on the same computer and choose one of them at startup. In this tutorial, you will learn step by step how to set up a dual-boot so you can enjoy the features of both Windows and Ubuntu.
Why Ubuntu?
Linux is a collection of operating systems (distributions) that are open source, meaning developers can view and modify the source code. Ubuntu is one of the most popular and widely used Linux distributions. Compared to Windows, Ubuntu is lighter, more stable, and in some cases faster, especially on older machines. Linux distributions are highly appreciated by developers because they natively support many programming languages. For example, most tutorials on this site are created on Ubuntu. So if you want to start programming, Ubuntu provides an ideal environment.
Why a dual-boot?
A dual-boot allows you to explore Linux while keeping Windows. This way, you can take advantage of the strengths of both operating systems on a single machine. For example, Ubuntu is better suited for development, while some applications and games are more compatible with Windows, or may only be available on that OS. The goal is to find a balance between the two environments without ending up using only one of them.
Requirements
- A computer running Windows 11.
- A USB drive of at least 8 GB.
- A USB media creation tool, such as Rufus.
- The Ubuntu disk image. Prefer a Long Term Support (LTS) version.
Creating the Ubuntu Installation USB
First, you need to create an installation USB. Plugged into your computer, it will allow you to boot from the USB and start installing Ubuntu.
Open your USB media creation tool. This example uses Rufus:
- Make sure your USB drive is selected in the “Device” section.
- In “Boot selection”, click “SELECT” to choose the Ubuntu ISO you downloaded.
- Leave the other settings as they are, as shown in the image below:
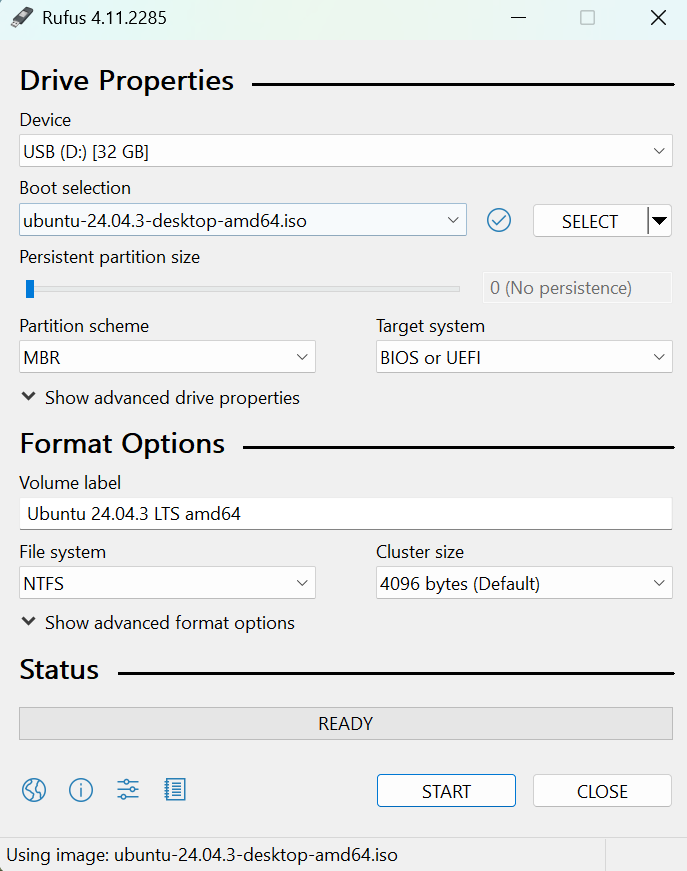
- Click “START”, then select the recommended option “Write in ISO Image mode” and confirm. Once finished, your USB installation drive will be ready!
Creating a System Recovery Image
Before modifying your disk, it’s recommended to create a system recovery image. This will give you a rollback point in case something goes wrong during installation. The procedure is detailed on the official Microsoft website.
Booting from the USB Drive
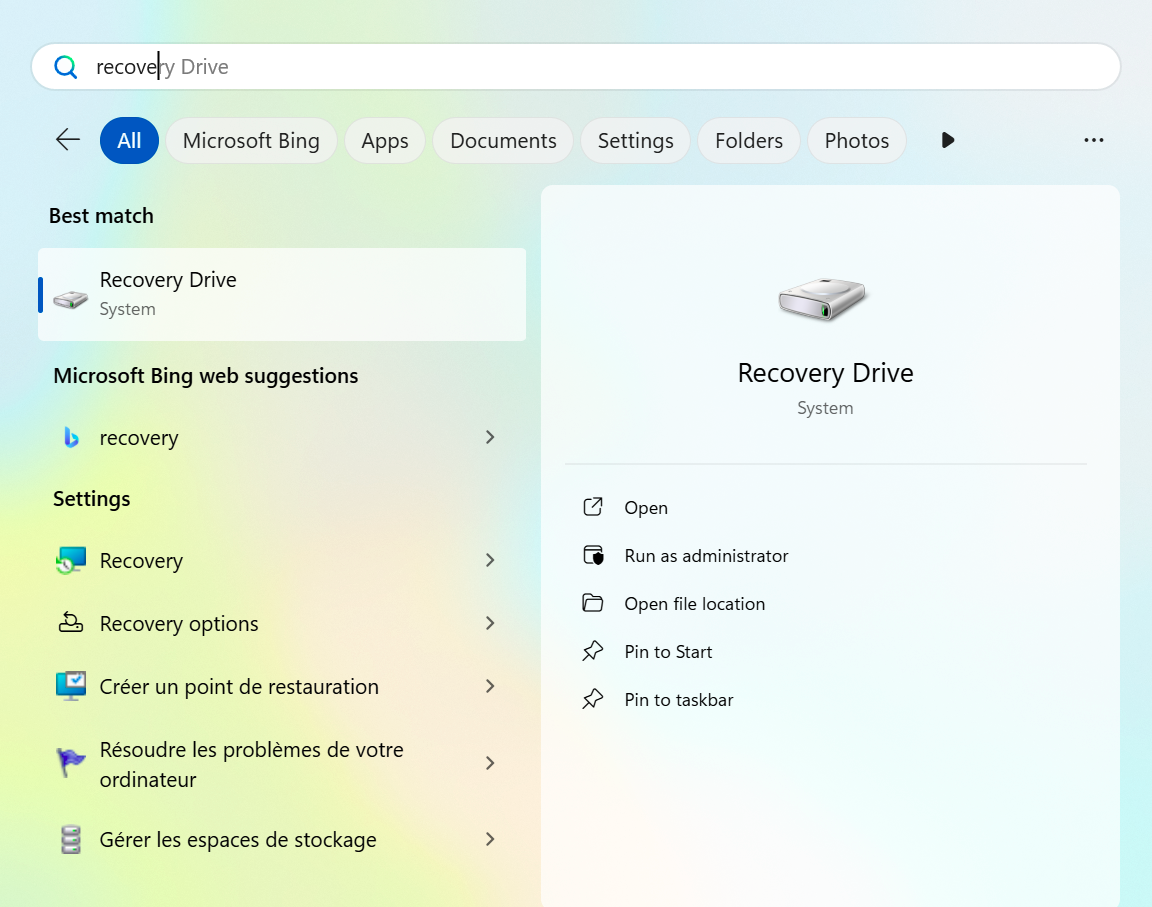
With your USB ready, restart your computer to start the Ubuntu installation. In Windows settings:
- Select “System”, then “Recovery”, and you should see an advanced startup option as shown below:
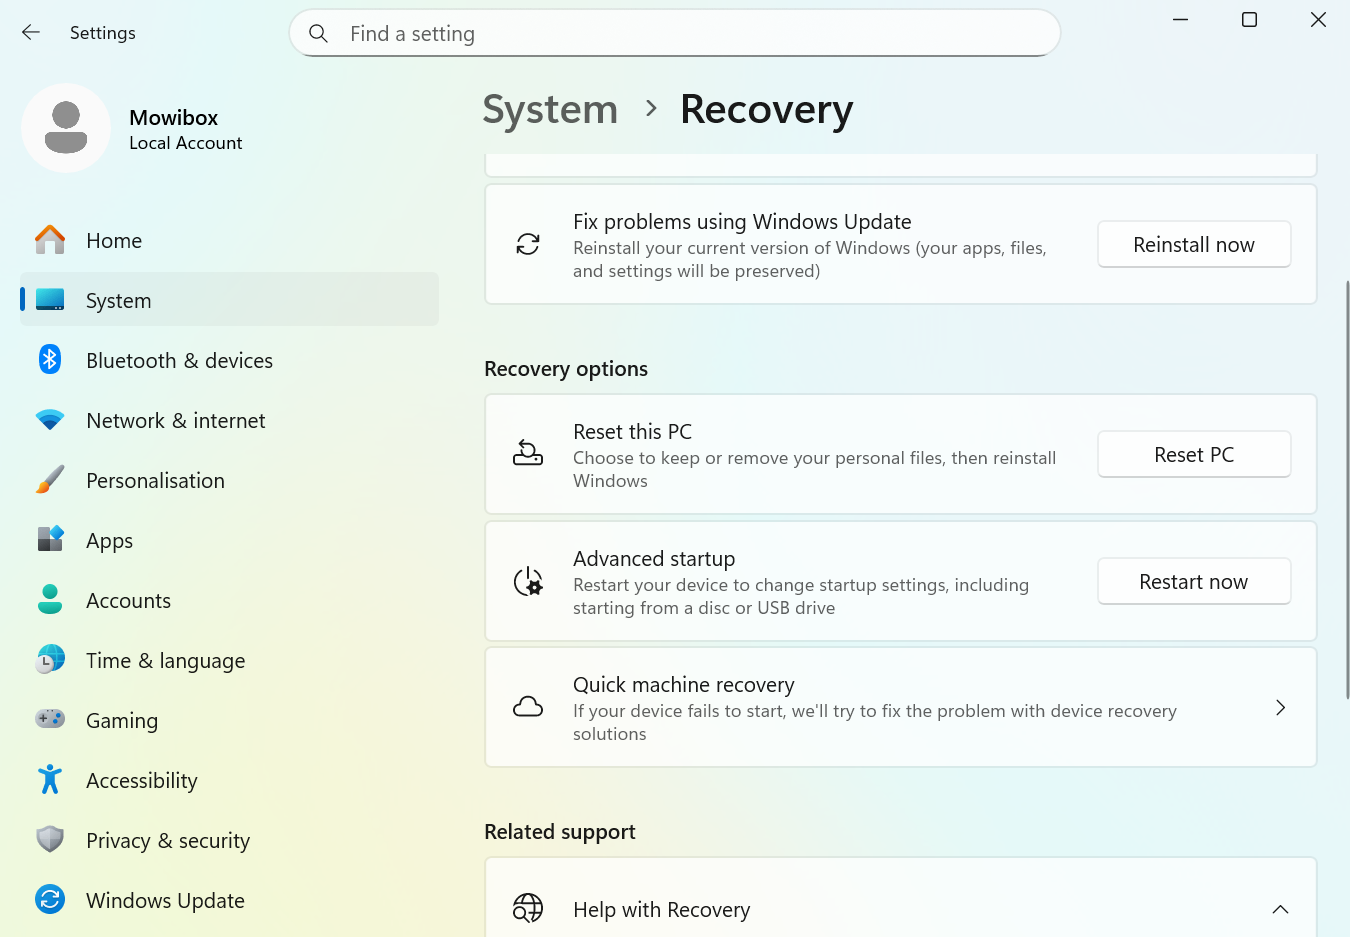
- Click “Restart now”. Your computer will restart (of course, you might say!) and display the advanced startup options:
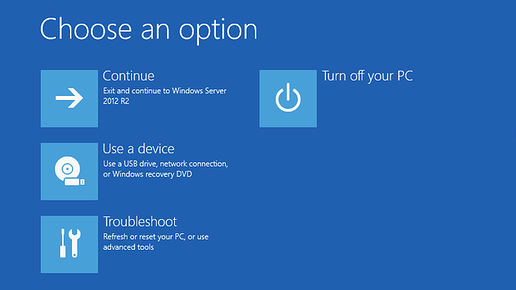
Choose “Use a device” and identify your USB drive from the list.
Clicking the correct installation media will boot the computer into Ubuntu, showing a black screen with several options:
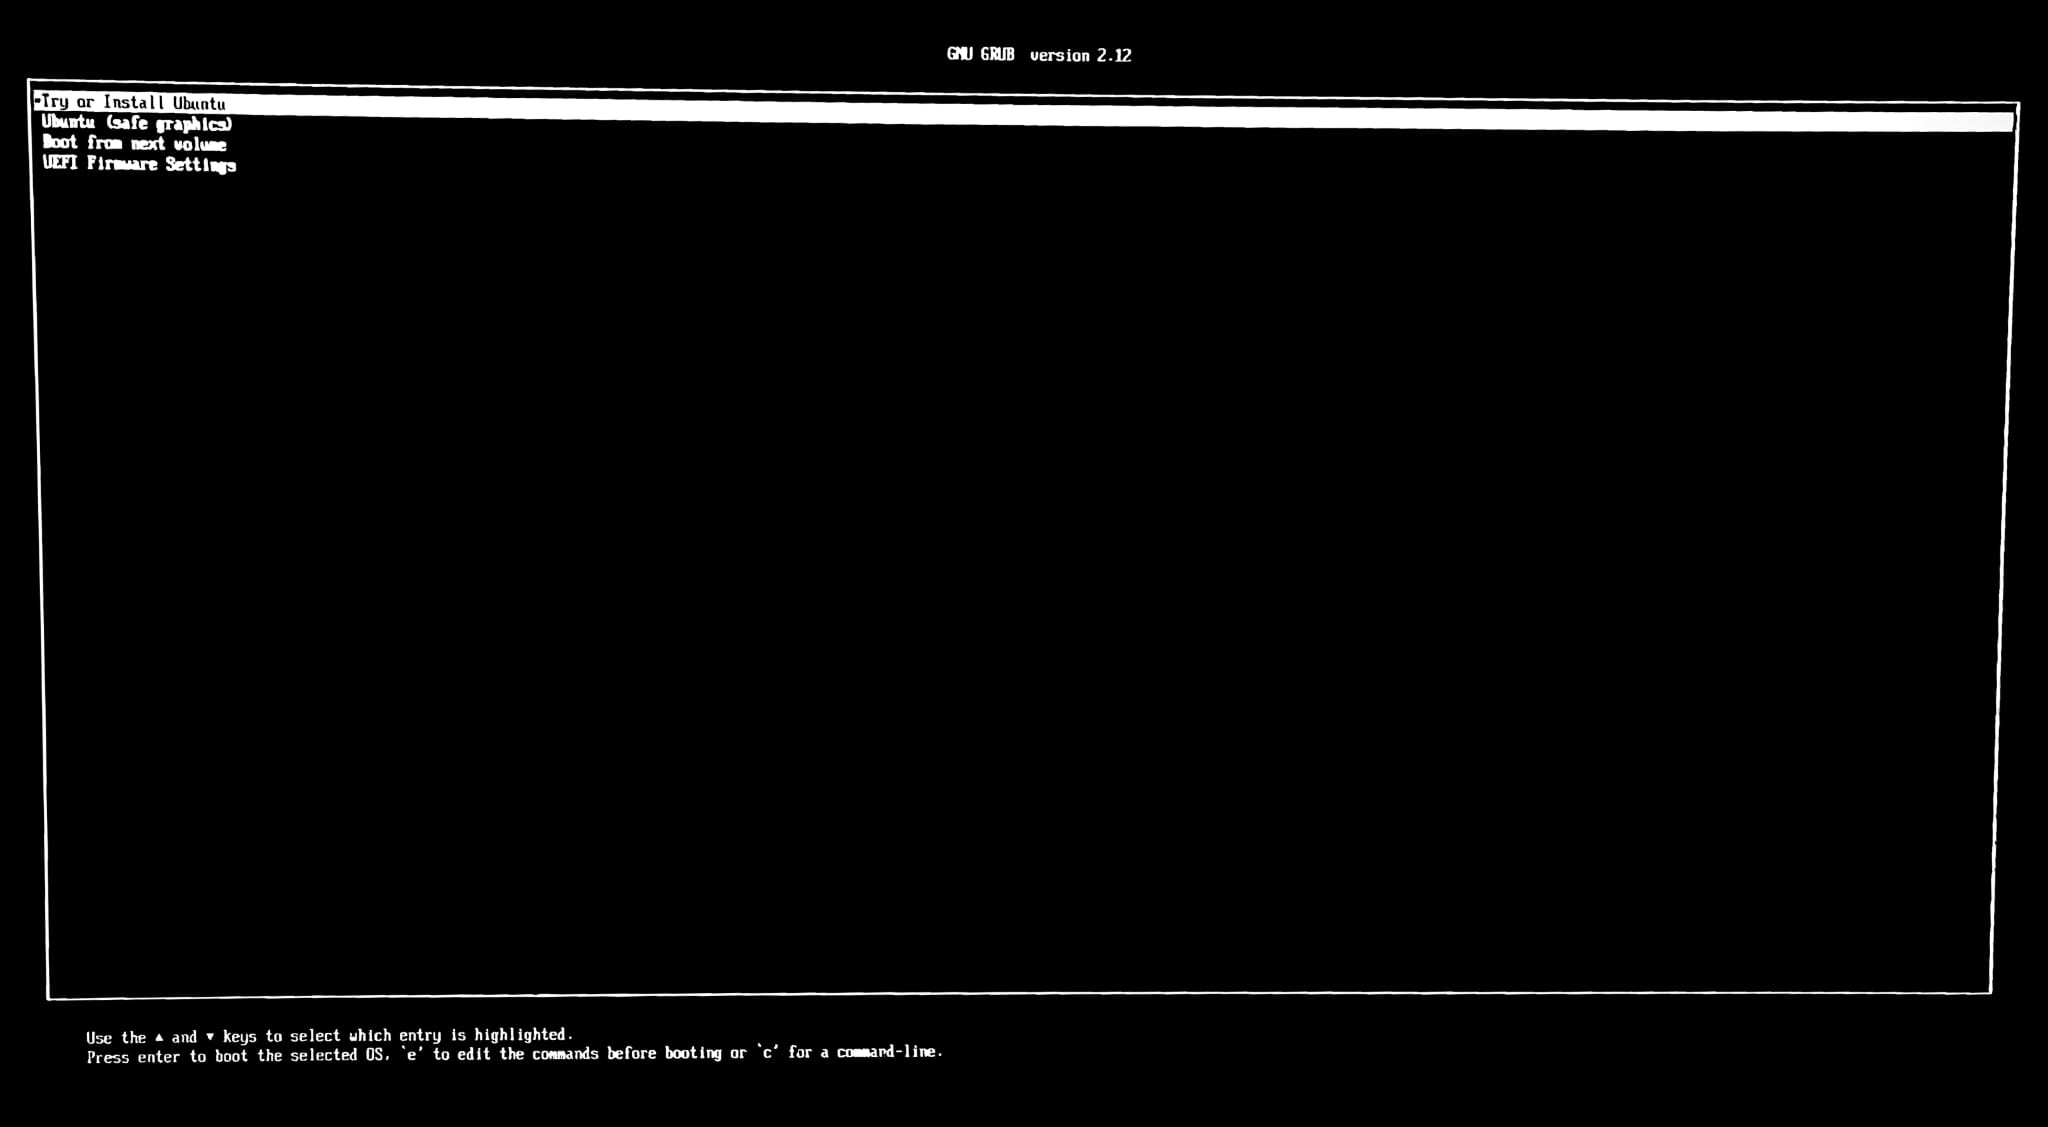
- Select “Try or install Ubuntu” and press “Enter”.
Installing Ubuntu
Follow the installer steps to complete Ubuntu installation:
Tip
If you close the installation utility, you’ll be able to access a full Ubuntu environment that you can explore freely. This is a great way to try out the system before deciding whether you really want to set up a dual-boot!
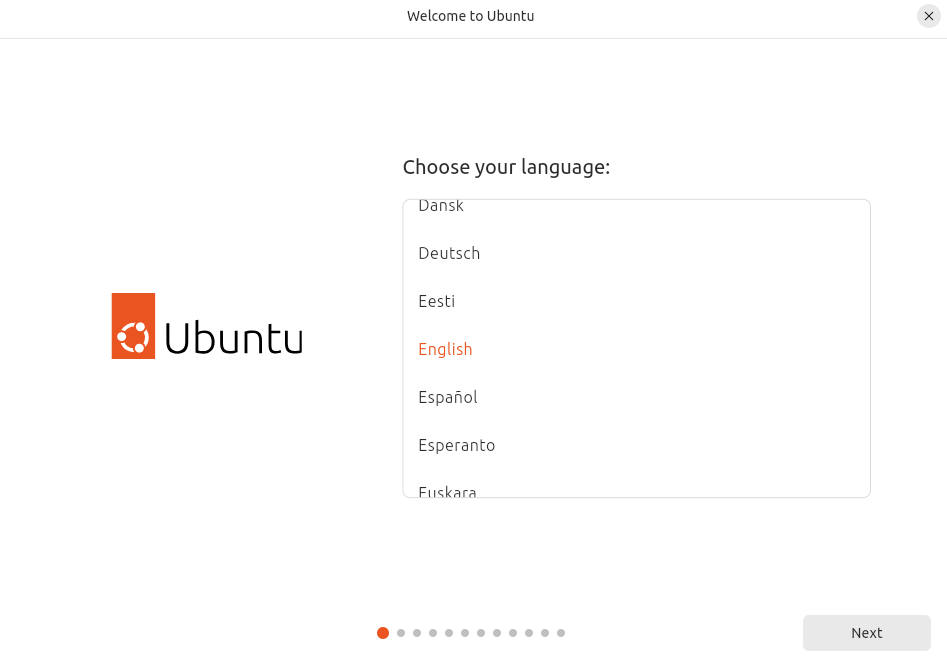
- Choose your system language:
- Then select your keyboard layout:
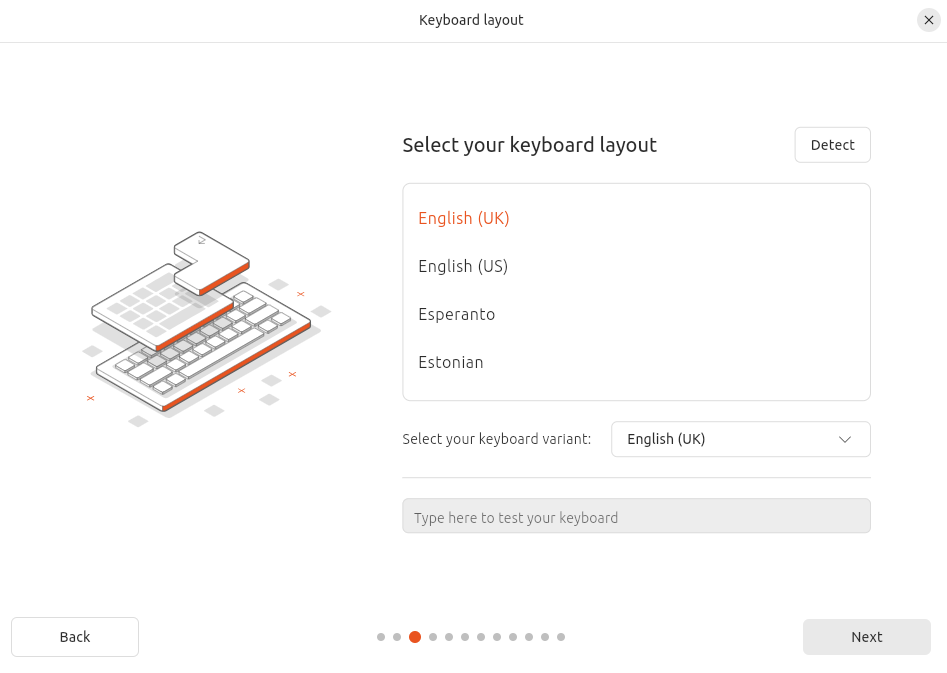
Tip
Ubuntu offers the “Detect” Keyboard Layout option to find your configuration interactively. Feel free to type in the test field to verify your layout!
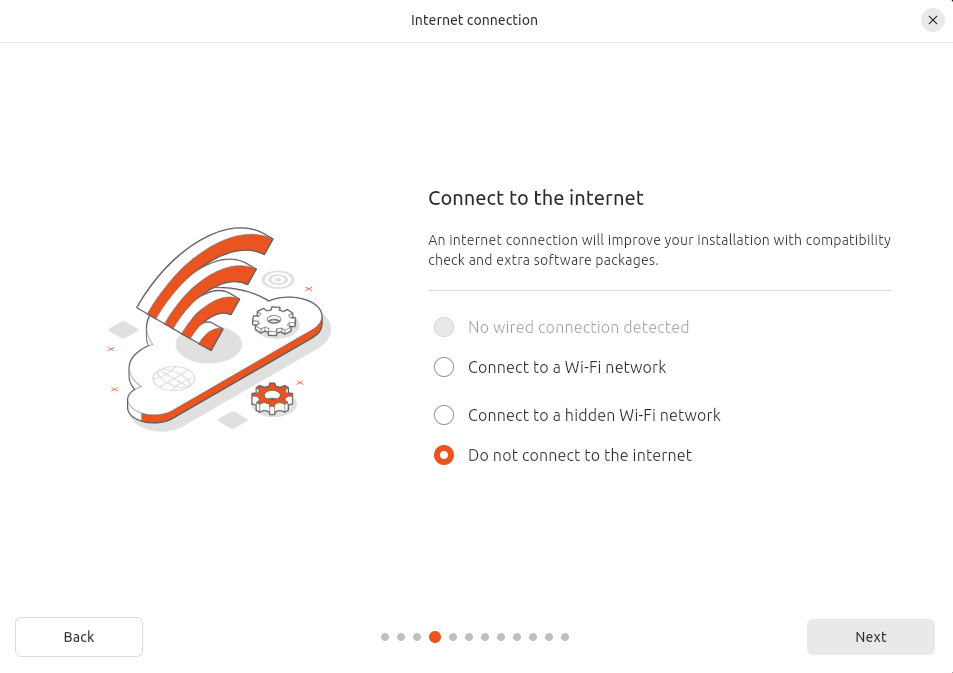
- Next, you can connect to the Internet (Ethernet or Wi-Fi), but it’s not mandatory for the rest of the installation:
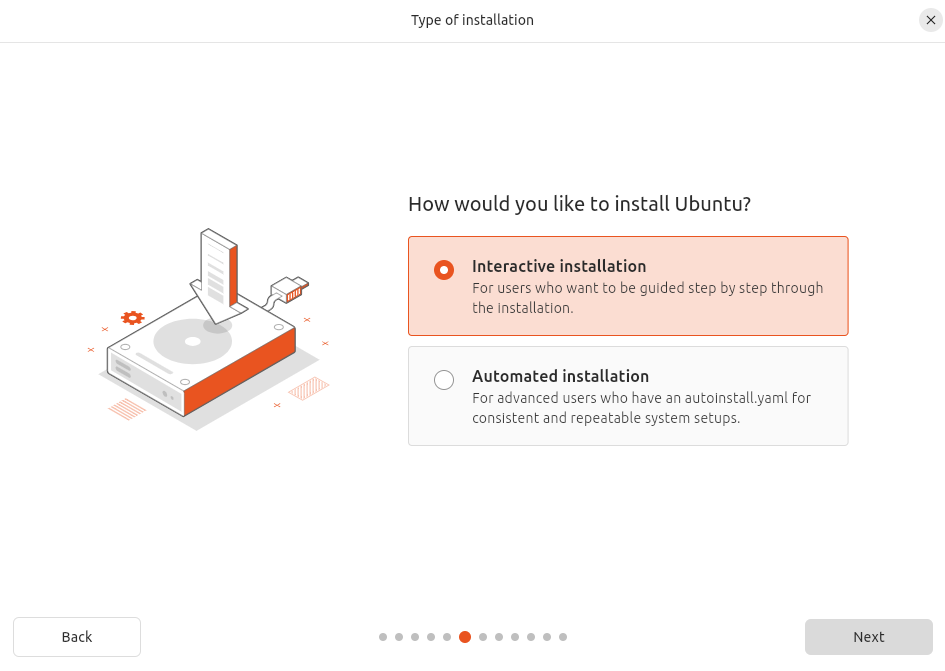
- Select “Install Ubuntu”, then “Interactive Installation”:

- Choose either “Default selection” or “Extented selection”:
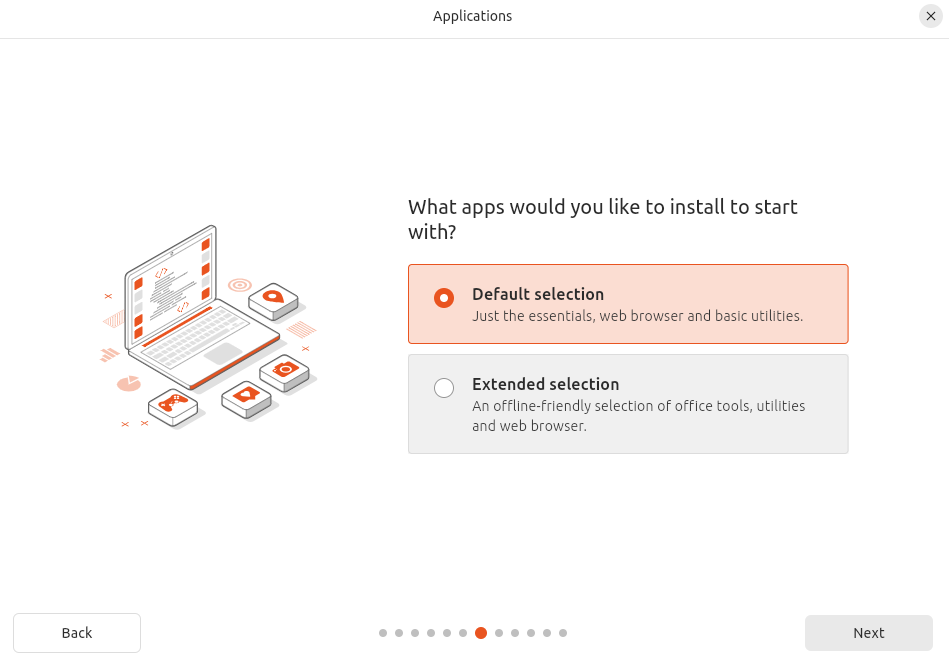
- Default selection installs Ubuntu with default settings: a complete desktop environment, essential software and packages. It’s usually the fastest and simplest option.
- Extented selection adds extra software such as multimedia utilities, games, etc. It takes more disk space and slightly longer to install but provides a richer experience.
- Optionally, check the boxes to install additional software for improved system performance:
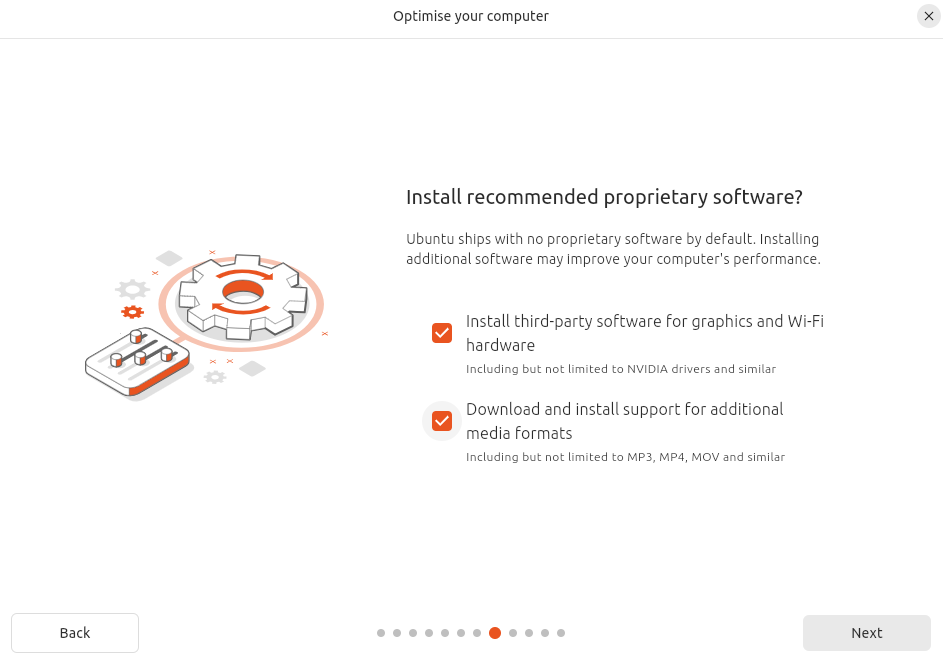
Note
If you installed without Wi-Fi, the option “Download and install support for additional media formats” will be unavailable. Personnaly, I recommend to select both options if possible.
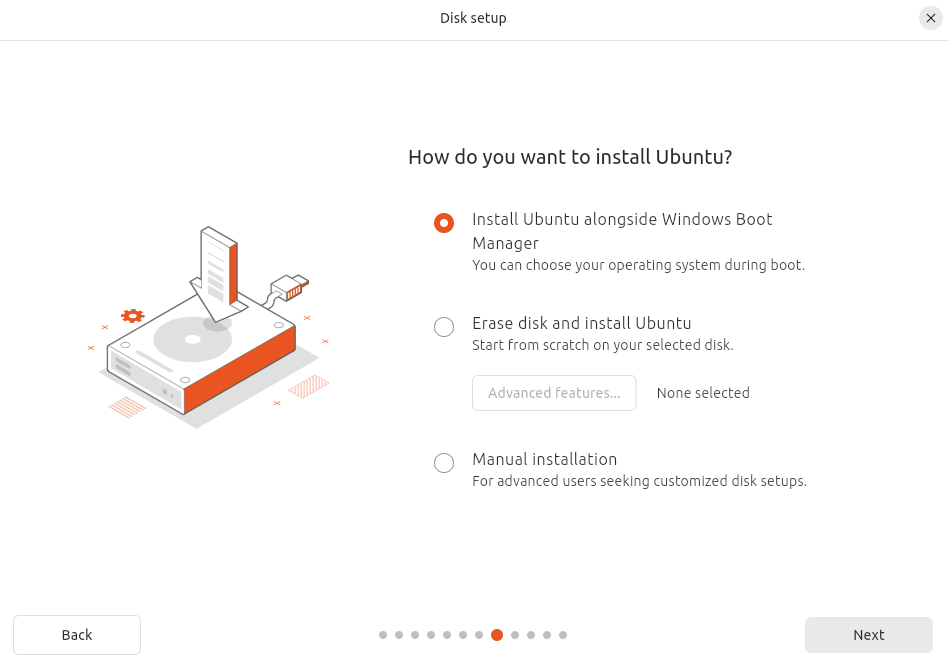
- To install Ubuntu alongside Windows, select “Install Ubuntu alongside Windows Boot Manager”:
Tip
Notice the “Erase disk and install Ubuntu” option. This option completely removes Windows and installs Ubuntu as the only operating system on your computer. In other words, from this point on, you already know how to install Ubuntu as the sole OS on a machine!
- The next page shows a slider to allocate disk space to Ubuntu:
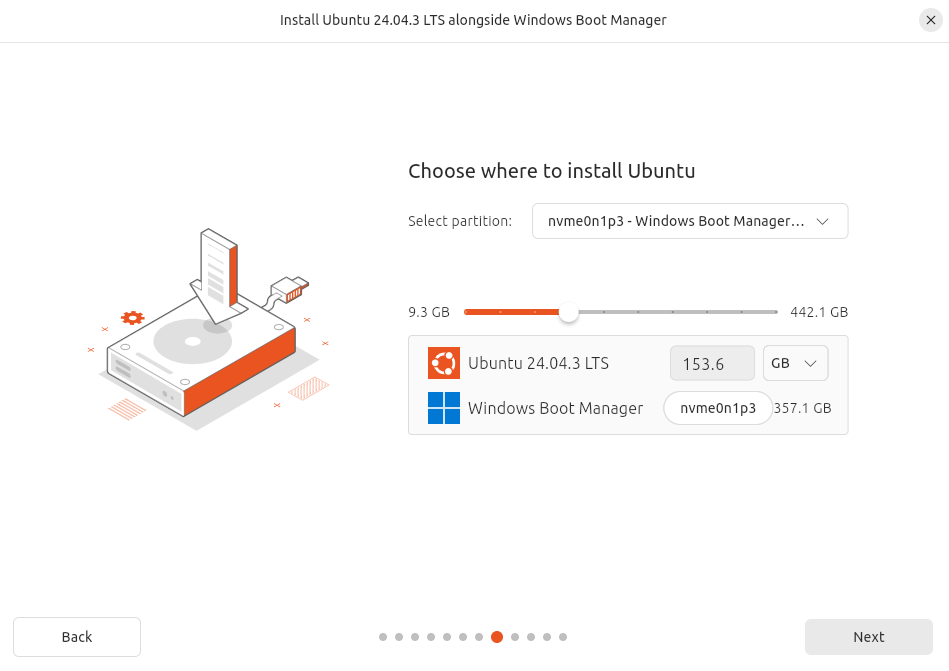
Here again, you can decide how much of your total storage you want to allocate to Ubuntu. For example, the computer used in this tutorial has 512 GB of storage. It would therefore be reasonable to allocate at least 100 GB to Ubuntu, in this case around 150 GB. But perhaps you will spend more time on Ubuntu and install a lot of heavy software compared to your Windows system, in which case the Windows partition would be smaller. It’s up to you!
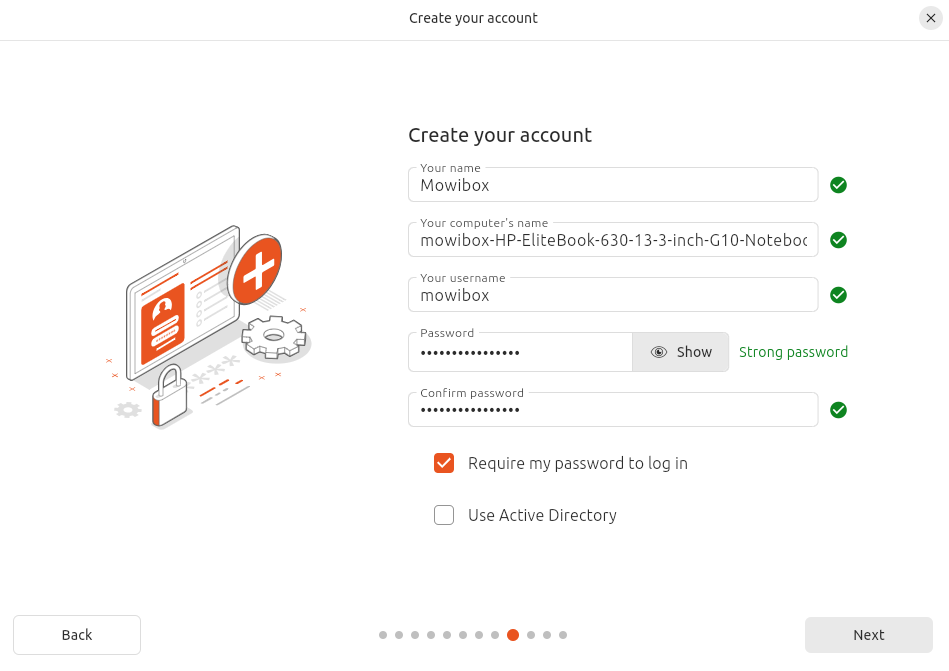
- Fill in your user account details: name, computer’s name, username, and password:
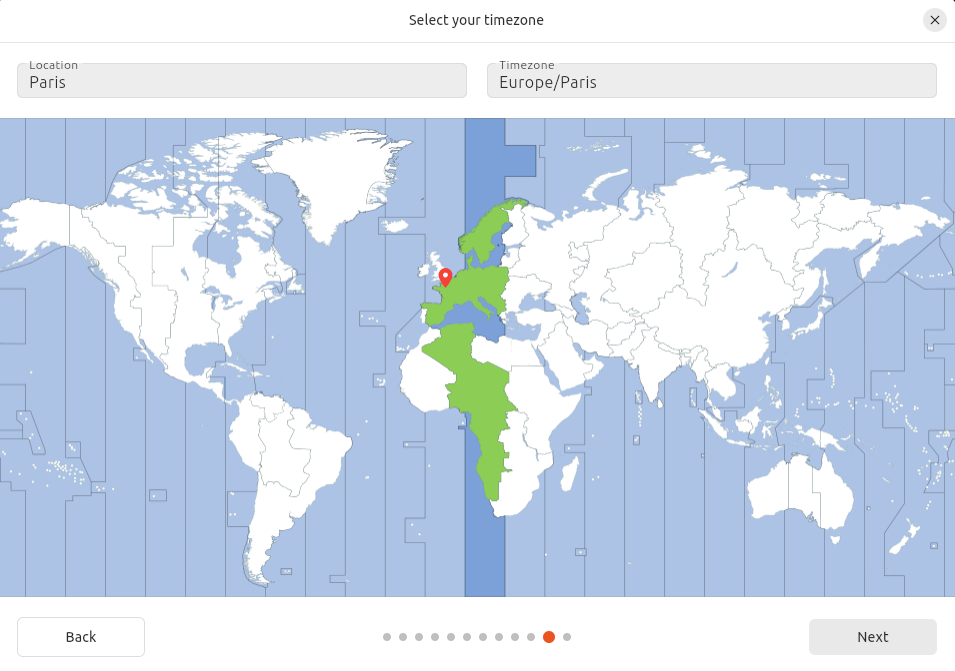
- Set your time zone by selecting your city or clicking on the map:
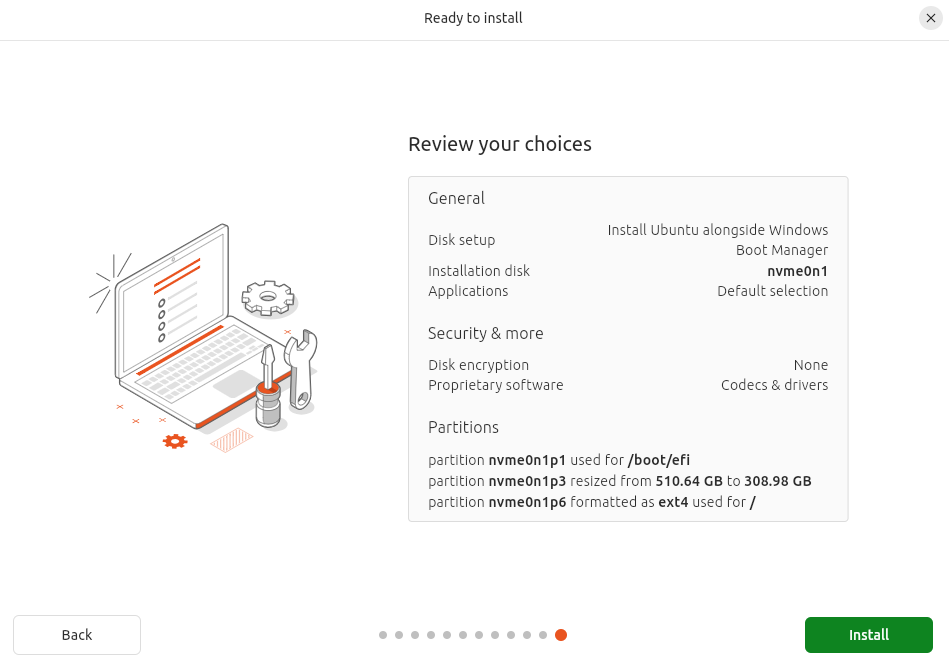
- Double-check that the settings you specified throughout the installation are correct. Everything is good? Great! All you have to do now is click on the “Install” button and wait for everything to finish. (If you’re bored, you can always read the installation notes that scroll by as you wait. You might learn something new about Ubuntu, who knows?)
Once finished, click “Restart Now”. Remove the installation medium when prompted then press “Enter”.
Launching Ubuntu
After reboot, you will see GRUB, Ubuntu’s boot manager:
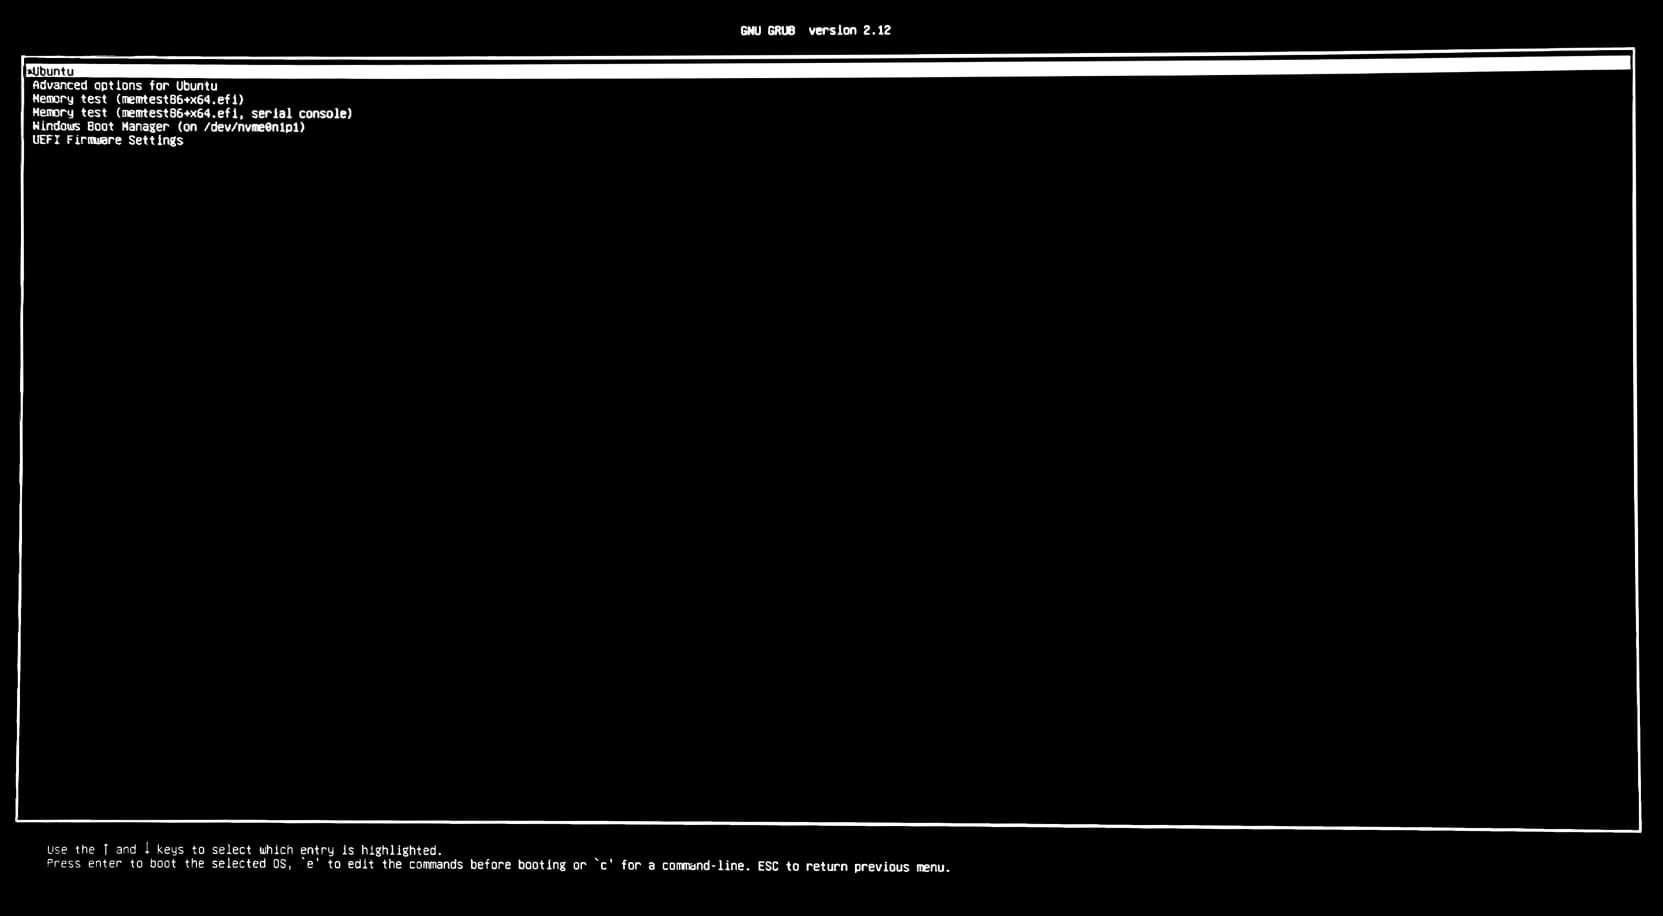
This interface allows you to select whether to boot Ubuntu or Windows (Windows Boot Manager). If you wait 10 seconds without input, GRUB will boot Ubuntu by default.
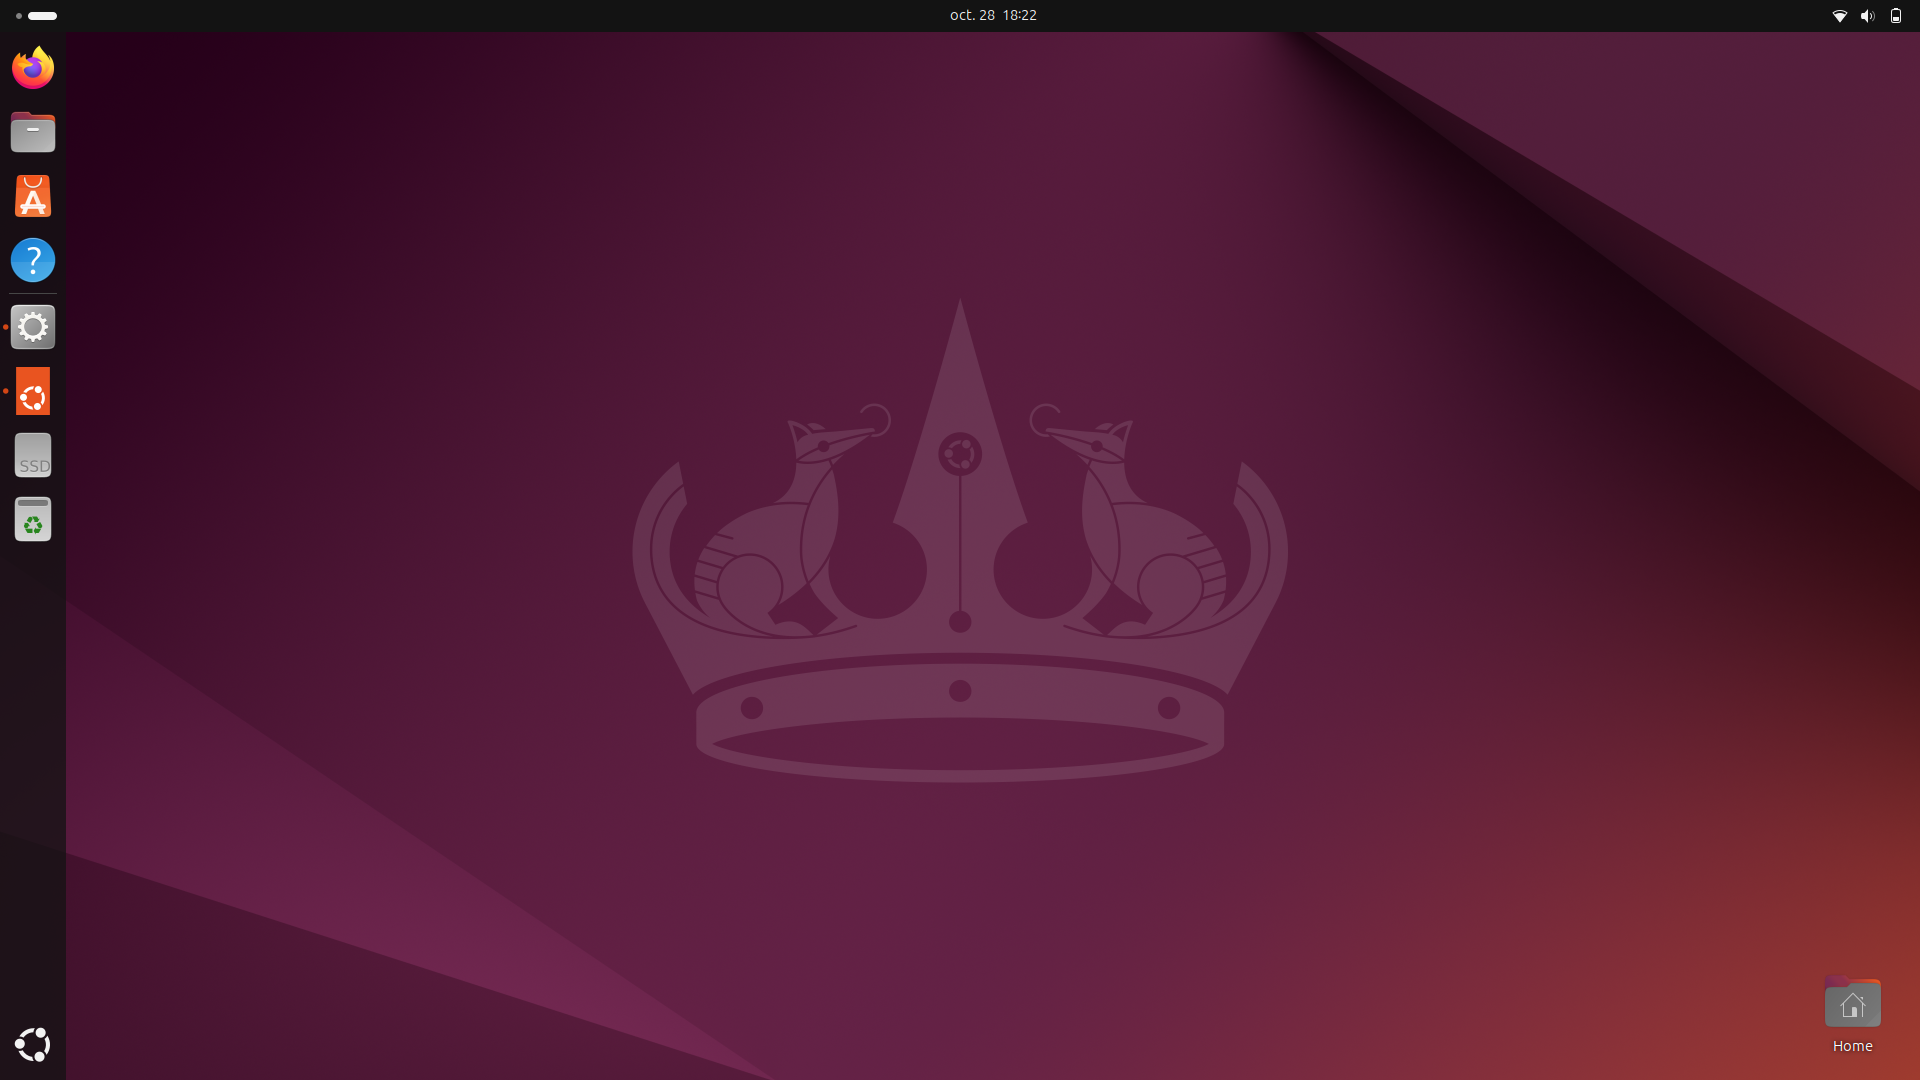
Log in to your user account to start using Linux: Welcome to Ubuntu!
Credits
- Author: Ousmane THIONGANE
- Last updated: October 2025
- Reviewer: